Tractor Stuff

My first excursion on a tractor was when I was seven. My 'uncle' Bill had a 1949 Ford 8N at his house just outside Chatham, Ontario. He used it to mow his grass, keep his gravel driveway in shape and plow the driveway in the winter. He decided I was a bit too city so he decided I should have a go at running the tractor. He patiently tried to explain to me how the bush hog was run by PTO and how one used the 3-point hitch to set the right height of the blades, how to work the clutch, and how to follow the line of the last cut to keep the lawn nicely patterned. With Bill riding the fender, I managed to navigate a couple of strips. I thought I did okay for a 7 year-old. 40 years later I got my own tractor, the 1941 Ford 9N.
While yes, everyone should drive an old tractor once in their life, a new tractor provides so much more utility. Having run a bunch of different types of 'heavy' equipment, we needed to make a decision about what would prove to be the more useful bit of kit for around the property. What you discover is that each piece of machinery is designed to do one job very well. You can extend a piece of equipment's utility with attachments in most cases, which is why we went with a compact tractor with a quick attach loader. Easy enough to swap the bucket for forks, or even a grapple, should the need arise. And having a 3-pont hitch means we can hook up a straight blade, box blade, land plane, mower (rotary / flail), snowblower - the list goes on.
1626 Stuff
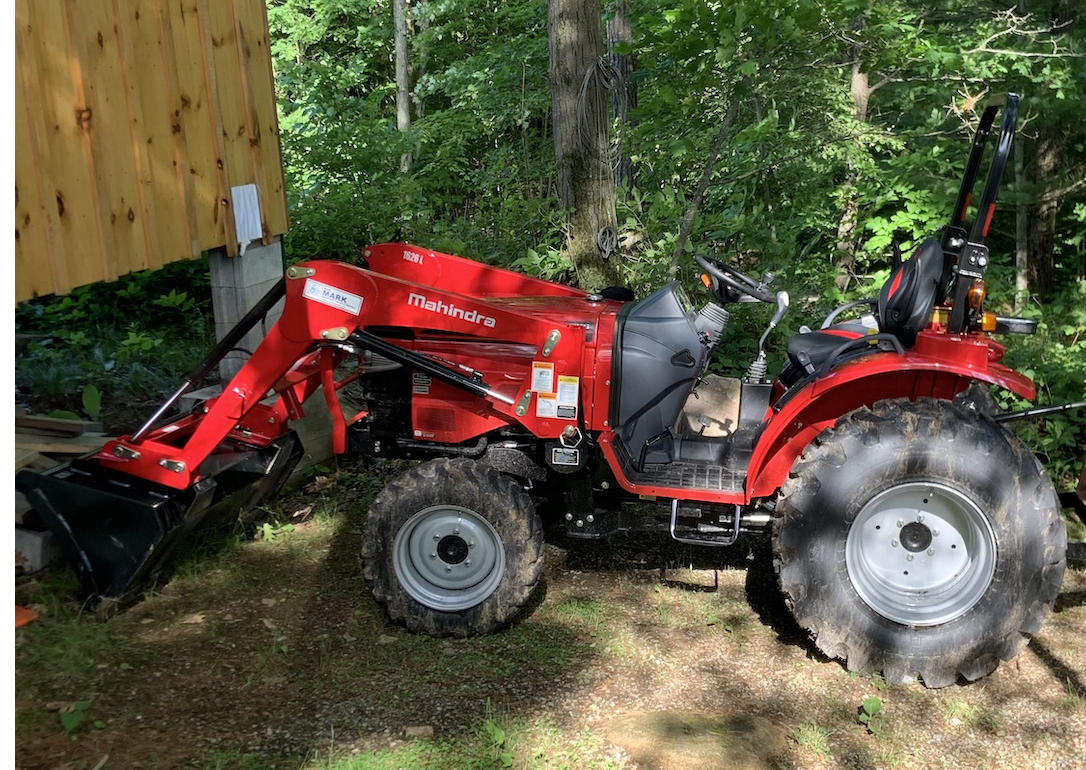 But as great and reliable as the old 9N is, and ten years on, it was time for a new one. We decided on a Mahindra 1626 HST for a number of reasons. Lots of internet research and YouTube reviews, what the local AG dealers carry, parts availability, and it didn't hurt that it's red. We have a theme at the cottage for red - doors, ATV, and now the new tractor.
So here's some specifics about the Mahindra. Yes, they are an Indian company that is the world's largest producers of farm tractors. They are stout machines - not much plastic and the parts that matter are made from thick plate steel. The diesel engine is manufactured by Mitsubushi and is a 3 cylinder 1.3 litre displacement rated at 25.9hp. We selected the HST (hydrostatic) transmission option rather than the shuttle shift because it's easier to drive the tractor when you're doing lots of start/stop/reverse - just a forward "go" pedal and a reverse pedal, no shifting gears. It's got a category 1 3-point hitch on the back and a quick-attach loader on the front. The operator's station is a little tight at times for someone my size, but the controls are easy to use and I'm not on the machine for hours very often. We did not get a cab since it was going to be stored inside and the extra money didn't seem worth it.
A couple of upgrades are in the works / already done:
- Set of 2 rear remotes - these are additional hydraulic controls for 3-point hitch attachments (done)
- Canopy for some shade in the summer months
- Hydraulic top link
- Trailer hitch receiver
- Extra lighting front and rear
- Pair of bolt-on grab hooks for chains (have them, haven't installed)
- Box grader (done)
- Flail mower (done)
- Set of pallet forks
- Steering wheel spinner knob (done)
First Work Stuff
The first real job for the Mahindra was to spread and grade over 70 metric tonnes of 3/4 minus gravel along the driveway, over the lower parking area, and create a parking bay for the 7-ton landscaper trailer. Some prework had already gone in to clearing the trailer parking pad off the lake side of the driveway with the removal of some saplings and clearing off the layer of leaves and topsoil. That part of the property is pretty low and needed to dry out a bit before putting the gravel down - it would have made sense to get a load of 3 inch minus to help pack down the area before the top gravel went in, but there was some time and budget constraints. We'll see how the parking pad fairs over the winter and spring and if we need to add the larger stone we will.
The Mahindra performed admirably dealing with clearing out the trailer area. Once the gravel arrived in 6 truckloads, it took just over four hours to shift the new stone was where it needed to be and levelled out. The lower parking area needed to be slightly extended and as level as possible for the construction of the new tractor shed, so a little extra care was taken with that work.
Up to this point the only attachments we had at hand were the front loader bucket and an old, tired straight blade that came with the 9N, and a trailer hitch receiver for the 3-point that we used the drag hook to pull small tree root balls out with. I had purchased a pair of bolt-on grab hooks for the set of chains already in inventory, but wasn't sure where to mount them on the bucket - some spots that were ideal didn't have very thick steel plate to drill through. One day I'll figure that out - or install them on a set of pallet forks that are not in inventory yet.Flailing Stuff With Precision
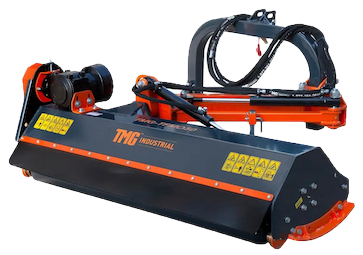
Given that flail means to wave or swing wildly (or flog). it's an appropriate description of the mower we got to manage the shoulders of the cottage road and a few areas around the cottage. A flail mower is designed to cut grass and any other sort of vegetation up to about 3 inches in diameter. The one we bought is what's known as a ditch-bank or offset flail mower - it's able to be tilted from vertical, past horizontal down about 30 degrees so it can cut the banks of ditches and branches up the sides of trees. The hammers are what do the cutting. The spin on a drum which is powered by the tractor's power take off (PTO) using a shaft with universal joints at each end to allow for a wide range of motion. The offset is hydraulically controlled by one of the tractor's rear remotes and at full extension you can cut about 6 feet to the side of the rear wheels. The angle of the mower is controlled hydraulically as well by the other rear remote. Once the PTO on the tractor is engaged it's a scary bit of kit... but it does the job.
Being precise when using the flail mower to cut the brush at the sides of the cottage road takes a bit of getting used to. Since the cottage road was pushed through the forest and up around some serious outcroppings of the Canadian Shield, there are a lot of roadside items (some hidden) that can really wreck your day - stumps and rocks are the biggest worry. Other bad things would be wire fencing, t-bars marking culverts, bits of old logging chain. The hammers are bolted on to the drum and are designed to break off if they hit something they don't like, but impacts like that are hard on the mower's gearbox and the bearings the drum spins on.
It takes four to five hours to mow both sides of the road and should be done a couple of times a year to keep nature at bay. We also use it to mow the back field at the old gas station and some other spots that tend to attract poison ivy. I might do a page specifically on the mower sometime because it is an interesting piece of machinery and maybe walk through an annual service on it.
New Spot To Keep Some Tractor Stuff
This is all covered on another page that talks about building the tractor shed.
Dealing With Tree Stuff
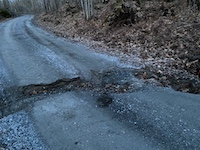
Back in the spring we experienced an ice storm at the cottage that caused significant damage to both the cottage road, the trees that line the cottage road, and the trees on our property. The road was dotted with its usual spring potholes but the storm, combined with the spring melt, washed out one of the culverts. Pictures never really do the depth of things justice, but that washout was over a foot deep and without a 4x4 truck you could not have crossed it. From that point to our gate is about 2.5kms and we needed to cut our way through over 50 trees of varying sizes that had succumbed to the weight of the ice and fallen across the road. One reason we take the chainsaw home in the fall and never head up to the cottage in the winter without it.
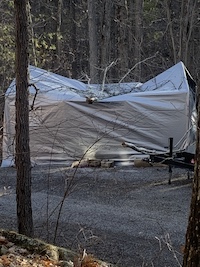
When we drove down the driveway to the cottage, which took some time because there were another half dozen trees blocking it, we found that the tarp shelter that had kept the tractor out of the elements over the winter had taken a direct hit from a four inch diameter sugar maple branch. Luckily, the metal tube frame of the shelter did take the brunt of the impact by six inches of grace there was no damage to the tractor.
Next step was to take stock of what the ice storm had done in close proximity to the cottage, barn, and bunkie. There was no damage to any, but the original cottage had been hit by a white oak branch that left a dent in the metal roofing. Other than that it was just clearing up debris. A lot of debris. Nine pines had lost the top third of their trunks, and on top of that there were pine branches scattered all over the deck and everywhere surrounding the cottage. There was too much just to drag into the bush to leave and rot, so we rented a wood chipper to mulch everything up. Pine mulch is pretty awful stuff given the resin, but we carted off a dozen or more wheelbarrows and spread that along the horseshoe pit path and on the forest floor. There were still spots down the hill to where the water pump goes into the lake that were still covered in pine branch debris, but slogging that up the hill (or through the bush) wasn't worth the effort or the risk of a twisted ankle.
We spent the next couple of months thinking that we were very lucky to have gotten through that ice storm without any damage to the cottage or out buildings (apart from the tractor shleter, which did its job). But what about the next one? They are happening far more frequently - when I was growing up I'd never heard of one; the first one that made the news that I remember was the ice storm that hit in 1997. Since then, there have been significant events in 1998 (Ottawa), 1999, 2002, 2006, 2013, 2023, and 2025 averaging 4.5 years between. Prior to 1997 they seem to have occurred in 1909, 1959, 1968, 1986, and 1990 - averaging 20 years between. It seemed likely the next one would happen fairly soon... So we decided to not push ur luck and take down any pines that could fall on the cottage.
In August we had an arborist come and review the state of the trees within the cottage danger zone. He was very thorough and showed us a number of oaks that weren't the most healthy and how to monitor them. After lots of discussion we agreed that 6 pines and a white oak should come down completely and a number of other oaks should be trimmed of dead/dying branches. The cutting had to wait until after the first frost and the oaks had mostly completed their autumn colour change. The arborist and his crew arrived early one Saturday morning in October and in 6 hours had felled the trees and trimmed the dead branches - they were great. And they were kind enough to load the landscape trailer with the branches that we then carted off to various parts of the property for disposal. The only cleanup that is still ongoing is to remove as many of the trunk sections from the bottom of the hill to the north of the cottage and deposit them along the side of the driveway on the hill up to the cottage to help with gravel erosion.
The result? More light, more breeze, more usable space on the lake side of the cottage. We don't even notice the trees that were removed. And some extra piece of mind that nature isn't going to damage what we've worked for.
Box Blade Stuff
Not only was there some tree felling at the cottage, but the 2025 summer has been marked by commercial logging. One owner not part of the cottage association struck a deal with two owners that are to provide access from the cottage road across their two properties to her 200 acres so that she could make some money. The two cottage owners also would reap some benefit from trees on their properties, but the larger plus was the clearing of path suitable for a driveway to access the one owner's cottage lot.
Another owner whose property directly abuts us to the north and who is the last owner on the road, also contracted with the logging company to have his ~200 acres to the north of his cottage selectively logged. They also would benefit monetarily and from the clearing of trails through the property that could be used for better access to the property both for hunting and sugar maple sap collection. This is all good stuff and they did come to the annual owners meeting to discuss their plans and assure the other owners that while there might be occasional inconvenience from logging traffic on the road, any damage to the road would be repaired.
After the annual meeting, the association did it's normal purchase of about $5K of 3/4 minus gravel that was spread along the road to fix up the damage caused by the spring melt and ice storm. It was then further manicured by one of the owners who works the road for us with his tractor and box blade. And the loggers have been good, I want to stress that, and the loggers got lucky with an extremely dry summer. But the trips in and out (out loaded is ~40 tons) took its toll on the road. Lots of compaction, lots of gravel shifted to the edge of the road, a few ditches pushed in, and areas of existing potholes worsened with new pot holes created.
As autumn arrived and winter approached, we were advised that our 'road man' was likely retiring next year. It was becoming physically harder to run his machinery and riskier to bring it from his farm along the shoulder of the highway. Understandable. So I decided to bite the bullet, like with the flail mower above, to get a box blade and with 'road man' tutilage work the road with the Mahindra.
I spent lots of time researching if a box blade was the right solution - there were straight blades and land planes to consider as well. What were best brands, what size was the best fit for the tractor and the road, what would provide the most capability long term, and how much do these things cost (and what would be the ROI in chargebacks to the association). After doing online research, talking to the dealer that sold me the tractor, ur 'road man', and watching a few dozen YouTube videos a 7' box blade was the best slution. Now, where to get one that wasn't going to be crazy expensive.
The time horizon for me to do the road work is likely 10 years and ideally the payback on the purchase would happen in a third of that time. Given the time it takes to groom the road and the amount of money the association collects in fees annually (and all the other costs the association has to cover) the budget was under $2k. So I started looking for one. Not so easy. The closest attachments dealer could get one in two weeks and all-in price would be $2,850... The dealer I bought the tractor could also order one in a week from a different manufacturer and give me a bit of a discount, but again we were looking at $2,625 all-in and delivered. So it was time for the online sellers - Kijiji, FB marketplace, and other AG websites that sold new and used.
I found a bunch of listings, but most were in southern Ontario and over 8 hours driving round trip. Factor in time and gas and possible pain of a warranty issue and they were ruled out. But, a fiarly local listing popped up and I contacted the seller. Yes, he had one. Yes, it was a newer brand but made by the Amish locally in Ontario. Yes, I could pick it up tomorrow. Yes, the total price was $1,545. And yes, it was red. Done. I drove just under an hour to his shop, he loaded it into the back of the truck with a telehadler, and I was back to the cottage in time for a late lunch. Unfortunately it was pouring rain, so the offloading would have to wait until the next day. Most of the ones I'd been looking at online were made with 3/8 inch thick steel plate - this one was 1/2 inch and everything about it seemed to be better build quality than the mass produced brands. And 'supporting local' was an added bonus.
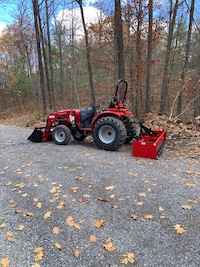
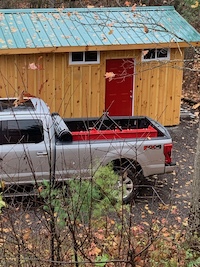
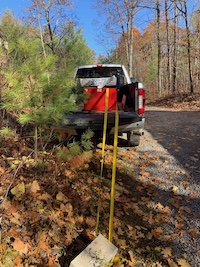
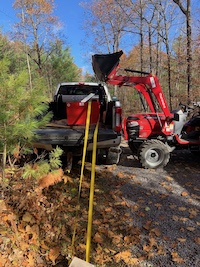
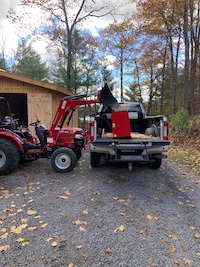
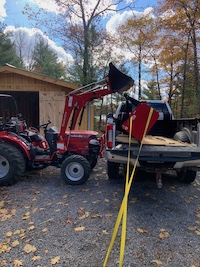
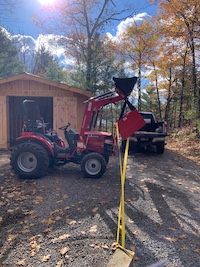
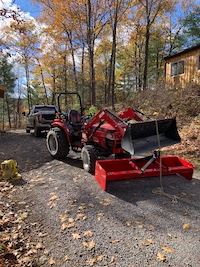
The series of pictures here essentially tries to convey unloading a 650lbs seven foot box blade with the Mahindra without damaging the truck, dmaging the box blade, damaging the tractor, or having yours truly damaged. I did remove the scarifiers before the first lift which lightened the unit likely by 120lbs (I figured each of the six rippers weighed in at 20lbs). Starting top left and working down the page:
- it fit nicely in the truck
- before first attempt to unload, I moved the truck to a low spot to give the tractor more lift, and used a strap and cinder block to keep it from spinning once lifted
- with chains around the bucket (should have insalled those hooks) the first lift on the top link bar simply tilted the box blade up since the lifting point was too far offset from center
- change of plan and orientation; tilted the box blade on its back to put lifting point more directly over top, but extra height reduced hw much the tractor could raise it off the bed
- again, rotation based on lifting point, but with spin 'anchor' and max'd out bucket lift got it off the bed
- hopped in truck, slowly pulled away so no issue with tipping over the tractor if the box blade hooked anything on the way out
- removed the anti-swing gear, rotated square to the driveway and lowered slowly to ground - safe
- first hook-up to the 3-point hitch - not quite the same red, but certainly not green or orange
Stuff That Makes A Tractor Happy