The Mini Barn
Timber framing. One of the remarkable advantages of having a cottage is the quiet time you have to think about what sorts of stuff you haven't tried, and as I was working on a solution to the seemingly never-ending issue of where to store stuff at the cottage, the idea of a mini barn crystallized. So, after reading a few books on the history of timber framing and how it's done, I drew up some plans and the assessment of a good location began.
The outside dimensions of the mini barn are set at 10' by 12', with a small front porch 4' deep cantilevered on the lake side, so the site needed to accommodate the footprint as well as cat-swinging room all the way around. If there was enough room on the west side to tuck in the Ford 9N tractor, the location would be deemed ideal. The original location was a gravel area to the side of the main drive down the hill from the cottage, but after seeking permission from the local municipality (granted) and the local conservation authority (not granted) the site was moved back up the hill to a fairly level spot on the trail to the bunkie. More convenient to the cottage, and certainly a better view, but this final location didn't leave lots of room around the barn and is situated under some large pines. I had hoped not to have any forest canopy above the roof, but it's not the worst outcome. For the record, the conservation folks were concerned that the mini barn was too close to the water's edge by about 10' feet. I didn't share that concern, but it wasn't something I wanted to argue since it would simply delay the start of construction, and the permit was going to cost about half of what the materials for the barn were going to cost.
Foundation
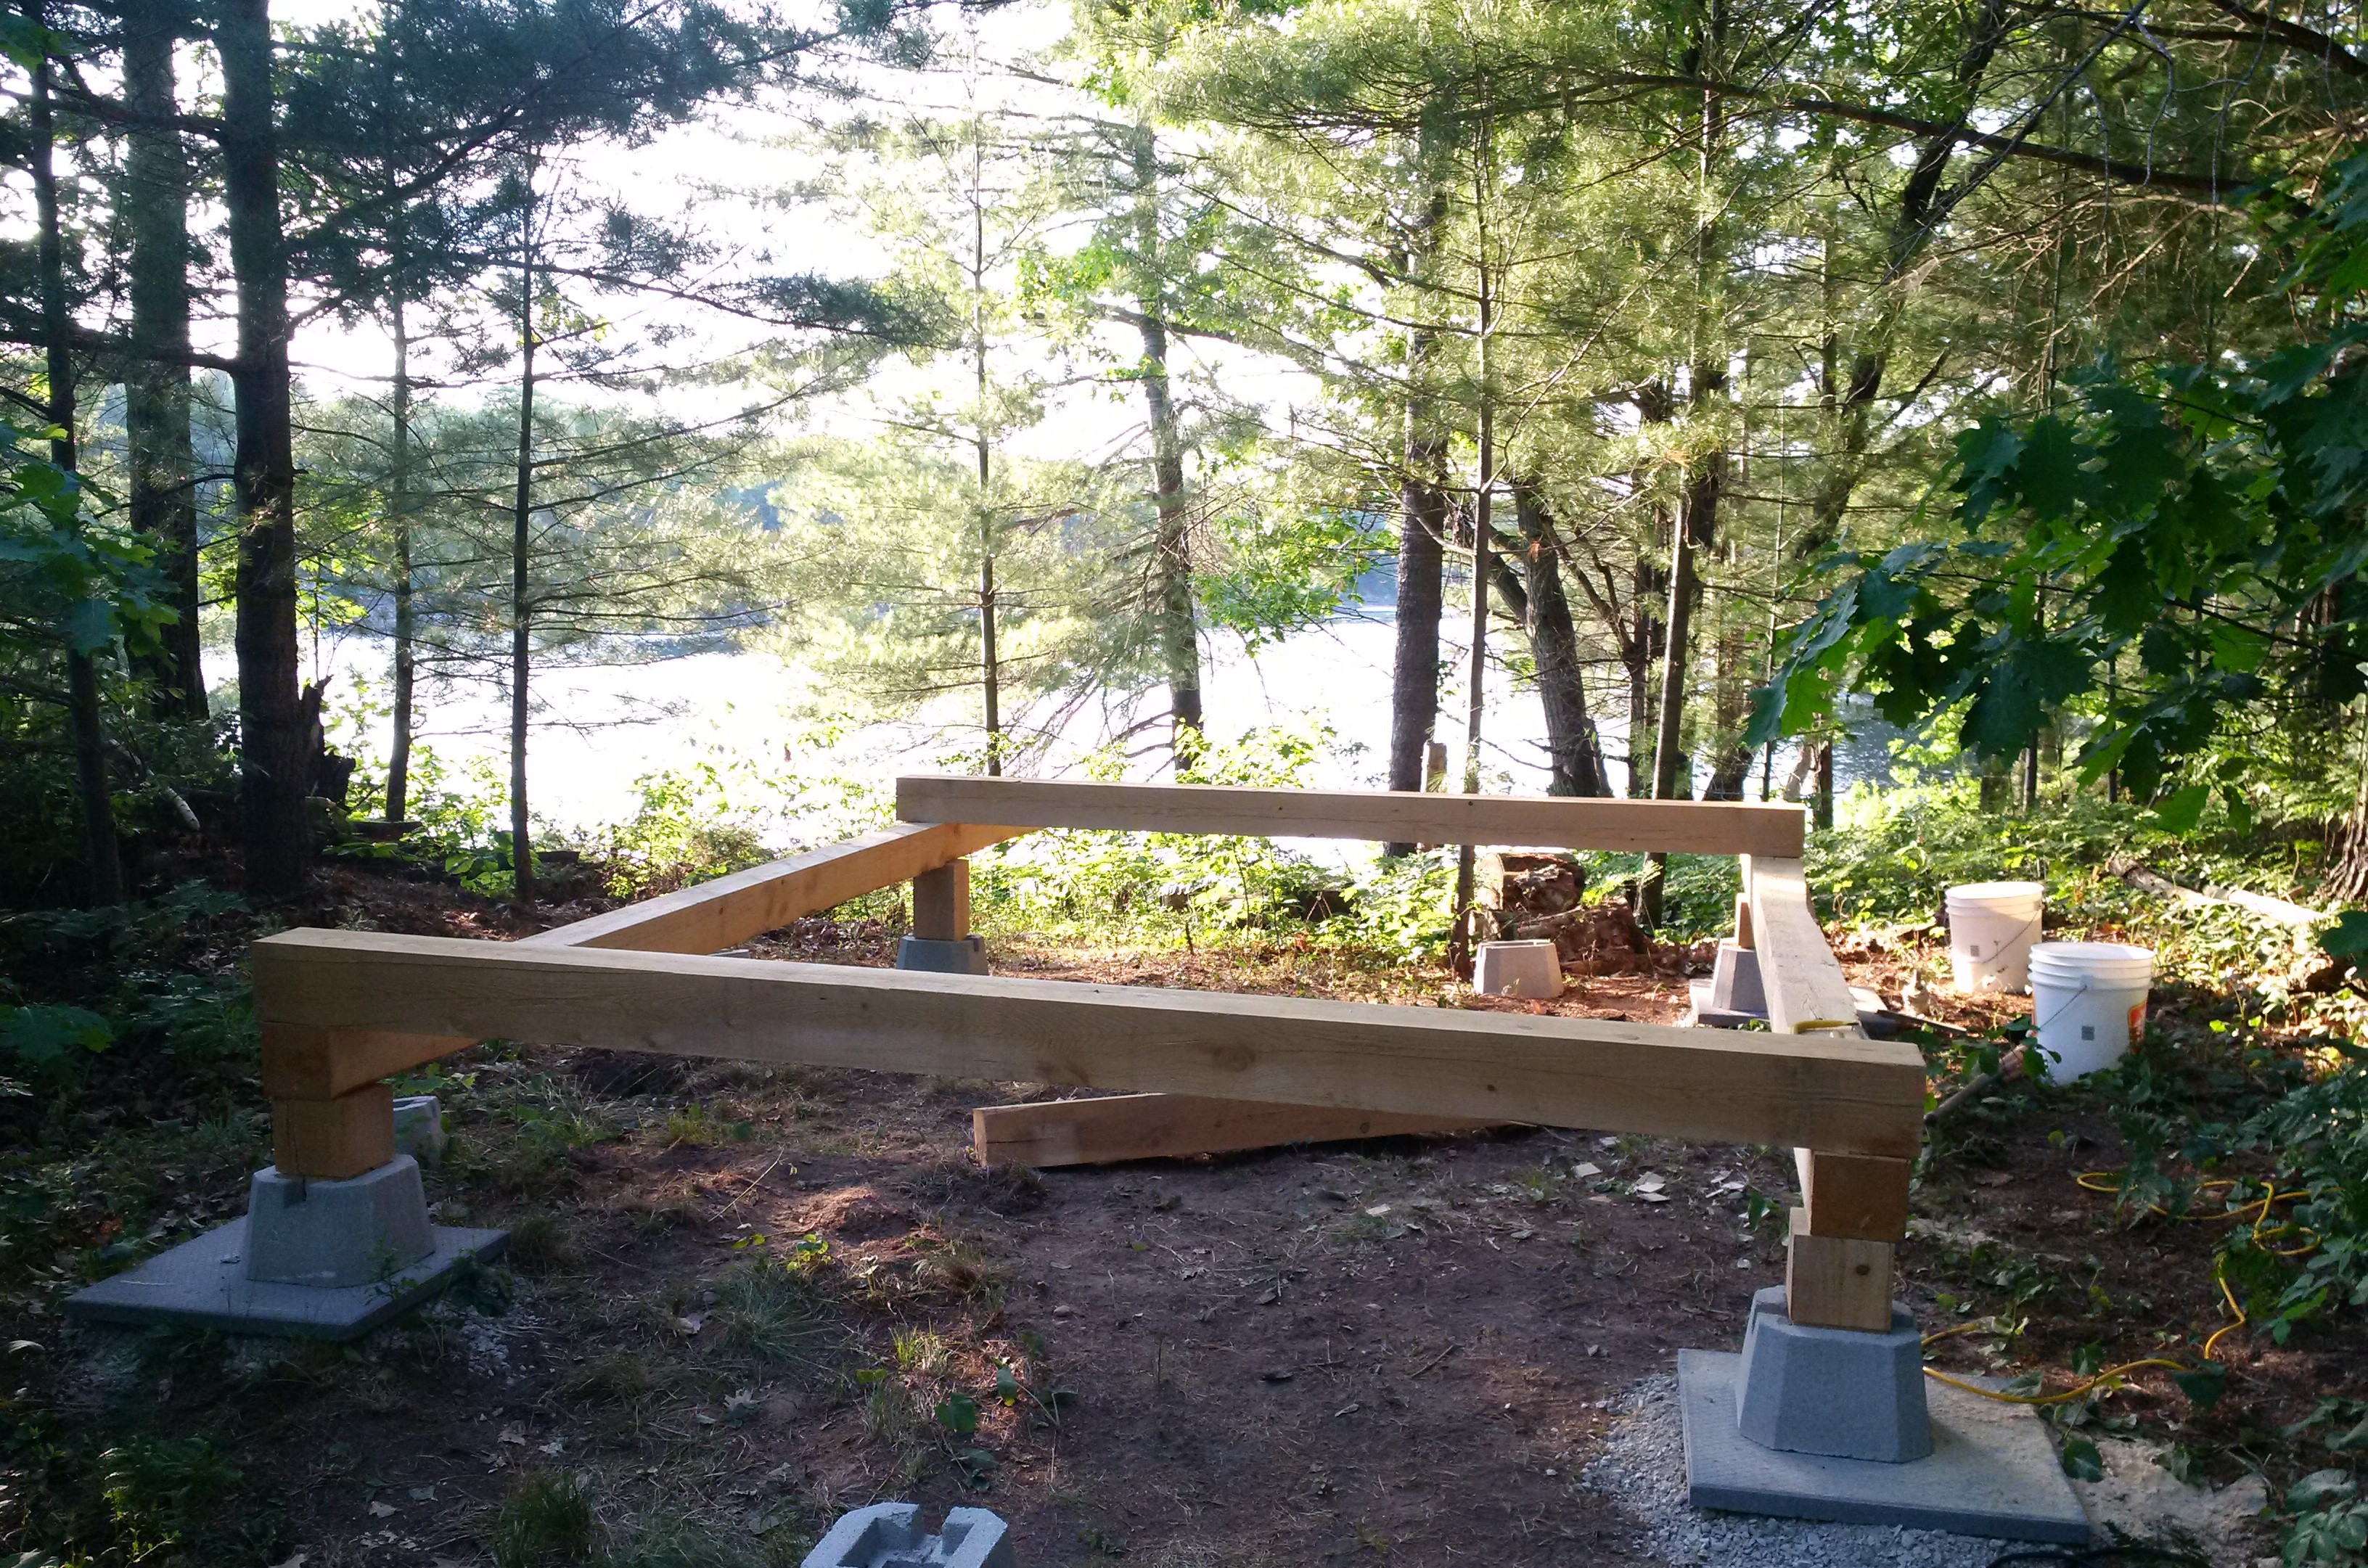
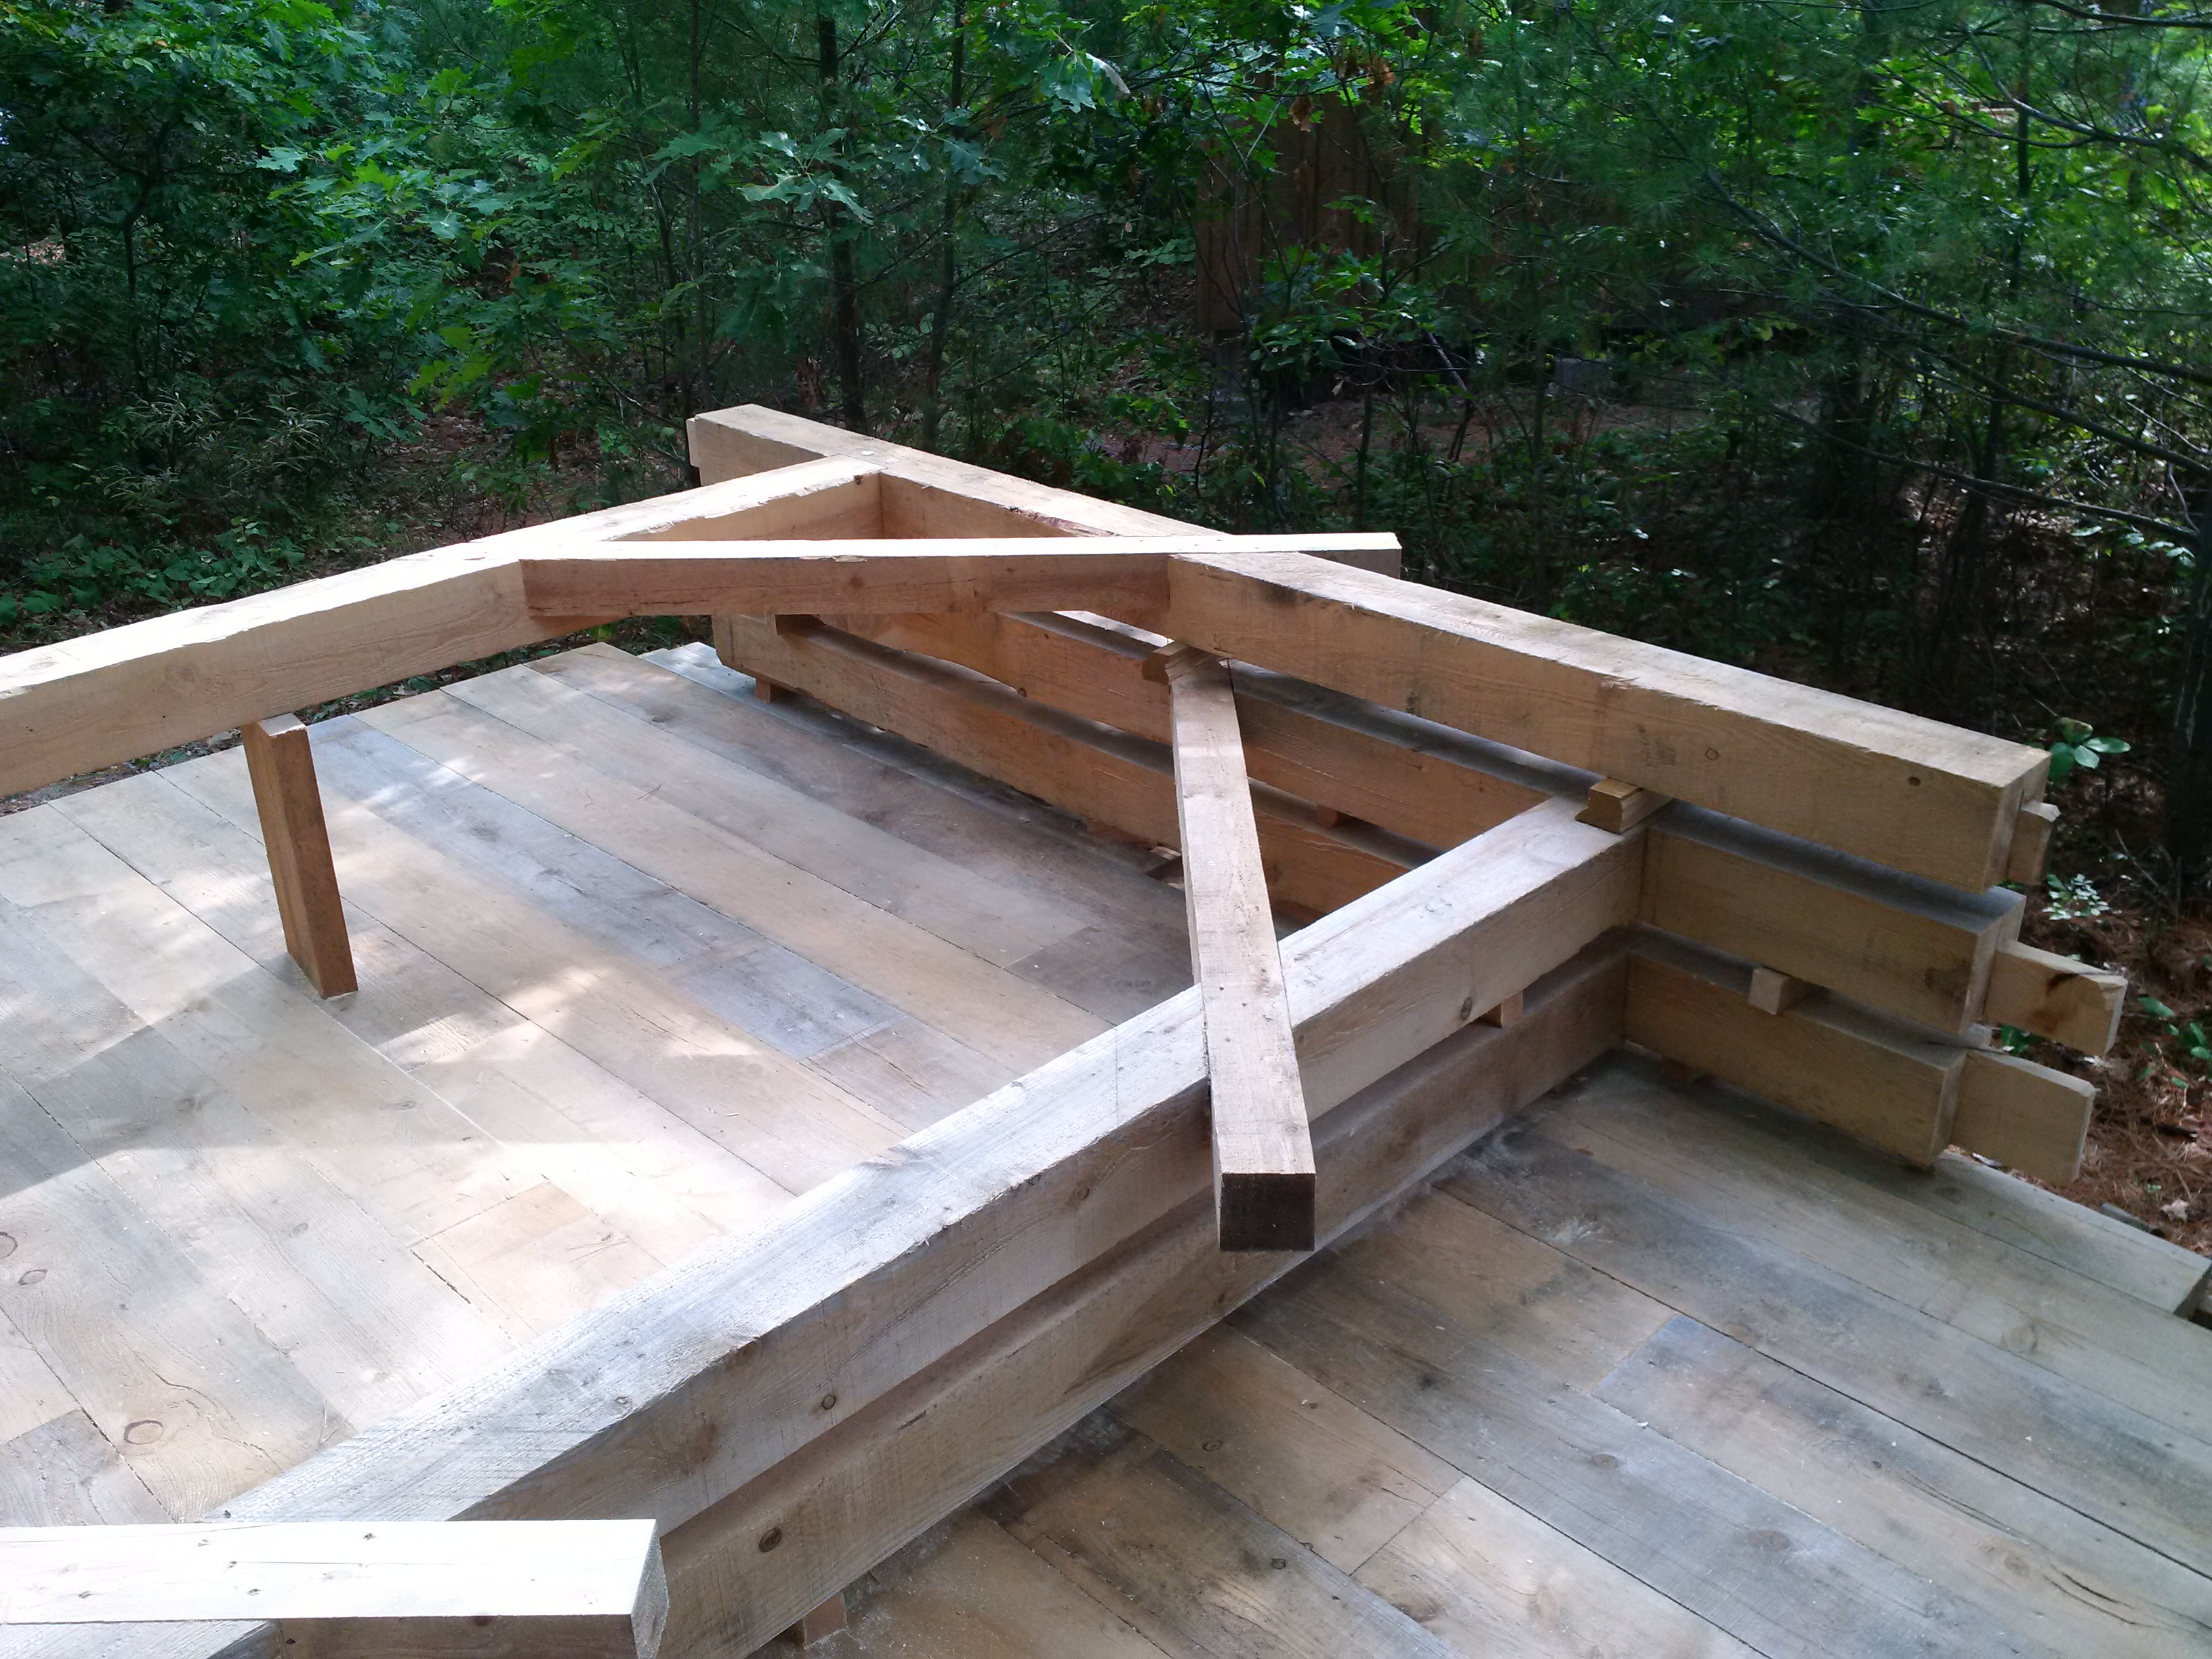
The next step in the process was to set the foundation. This is not difficult: set concrete pads on compacted gravel at the points where the barn needs support, set concrete post holders on the pads, check dimensions and then square it up on the diagonals. Done. You'll see in the picture below that the long 'main' timbers are not sitting exactly on top of the stump posts; they are offset 1 inch to provide a ledge to support the cross beam. Since I wasn't using a full dry-stone foundation, where the beams would be supported for their entire length, it was prudent to give the cross beams something to rest on as the tenon wouldn't be able to hold the weight. The 10' cross beams can be handled by one strong person, the 16' lengths require two people (however one person can move them by using pivot points and a little ingenuity).
Timbers and Tools
 Timbers. White pine, eastern hemlock, eastern white cedar. The three main options are all equally strong, provide decent weather and
insect resistance and are equally easy to work with; hemlock may be the heaviest however. The main differentiator is price. Since the
mini barn is going to be a space for stuff there is no requirement for high-end timber. Hemlock will be the material for all the framing,
exterior cladding and roof boards (to be covered with a metal roof). Square edge hemlock will also be used for the flooring.
Timbers. White pine, eastern hemlock, eastern white cedar. The three main options are all equally strong, provide decent weather and
insect resistance and are equally easy to work with; hemlock may be the heaviest however. The main differentiator is price. Since the
mini barn is going to be a space for stuff there is no requirement for high-end timber. Hemlock will be the material for all the framing,
exterior cladding and roof boards (to be covered with a metal roof). Square edge hemlock will also be used for the flooring.
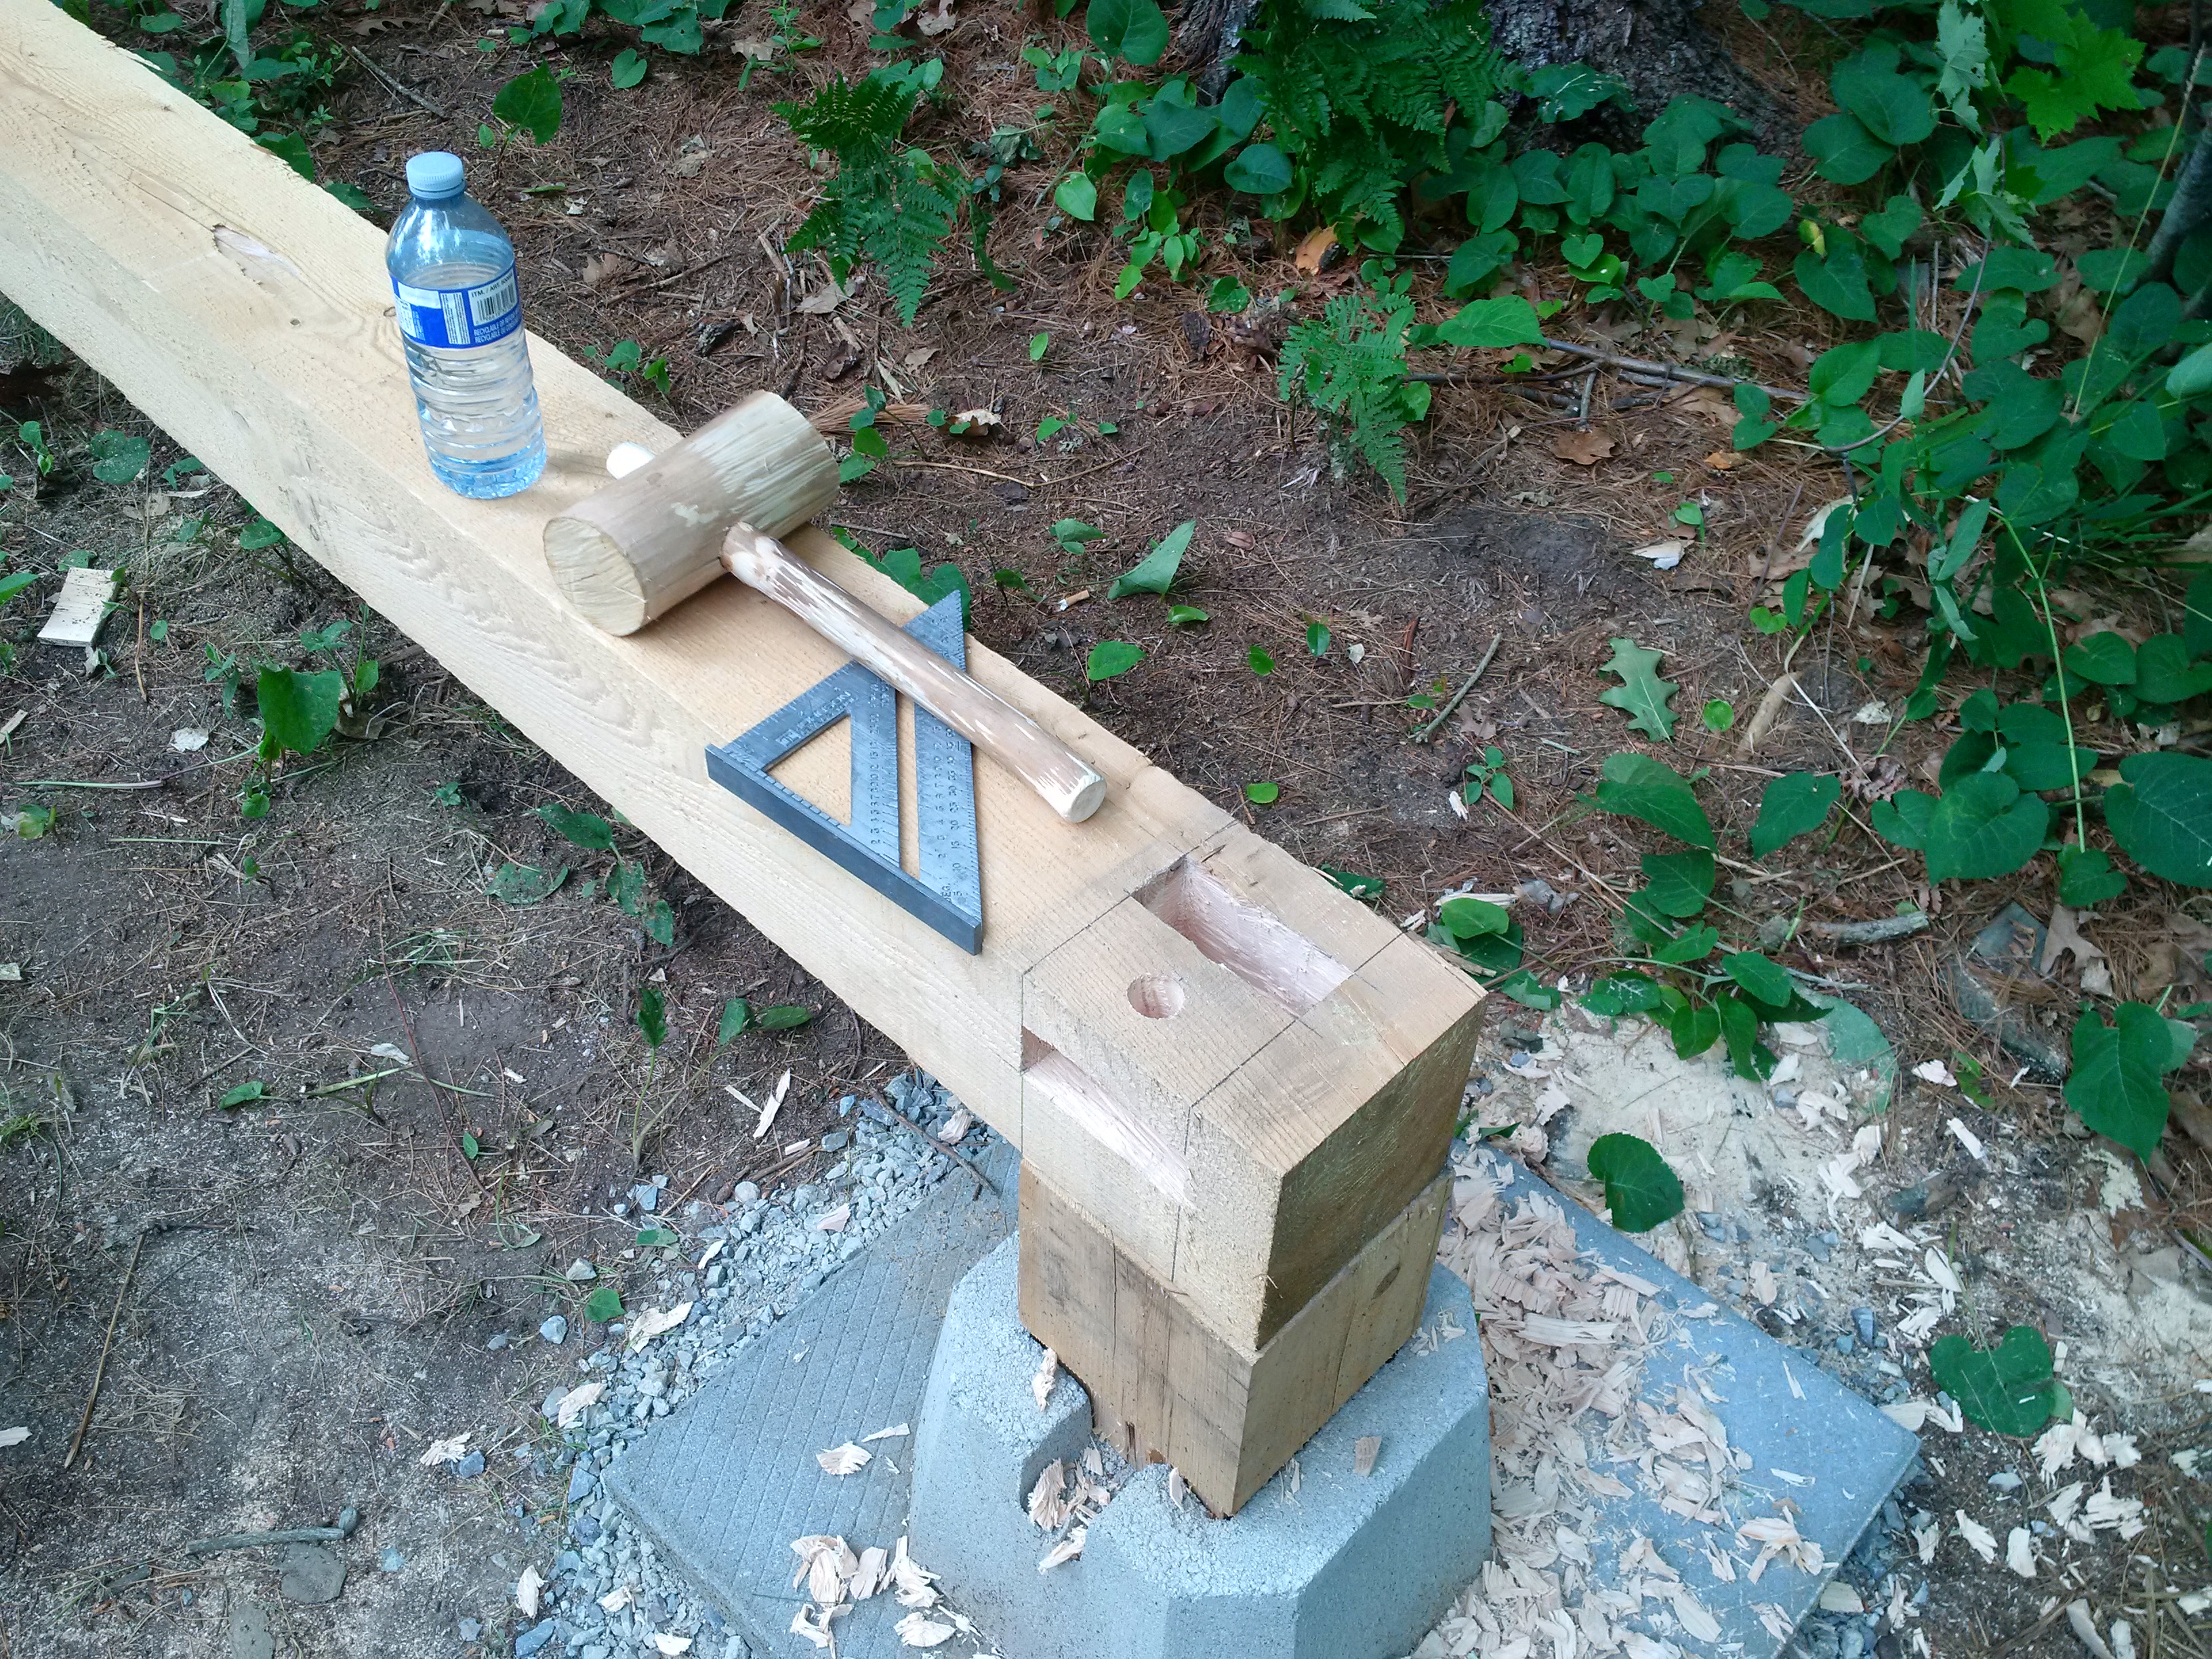
Tools. Nothing fancy. A few Robert Sorby chisels (1, 1.5, 2, and 1 inch corner),
a wooden mallet (homemade or bought), a hand saw, 1 inch auger drill bit, speed square, framing square, level, tape measure.
Sill Beams
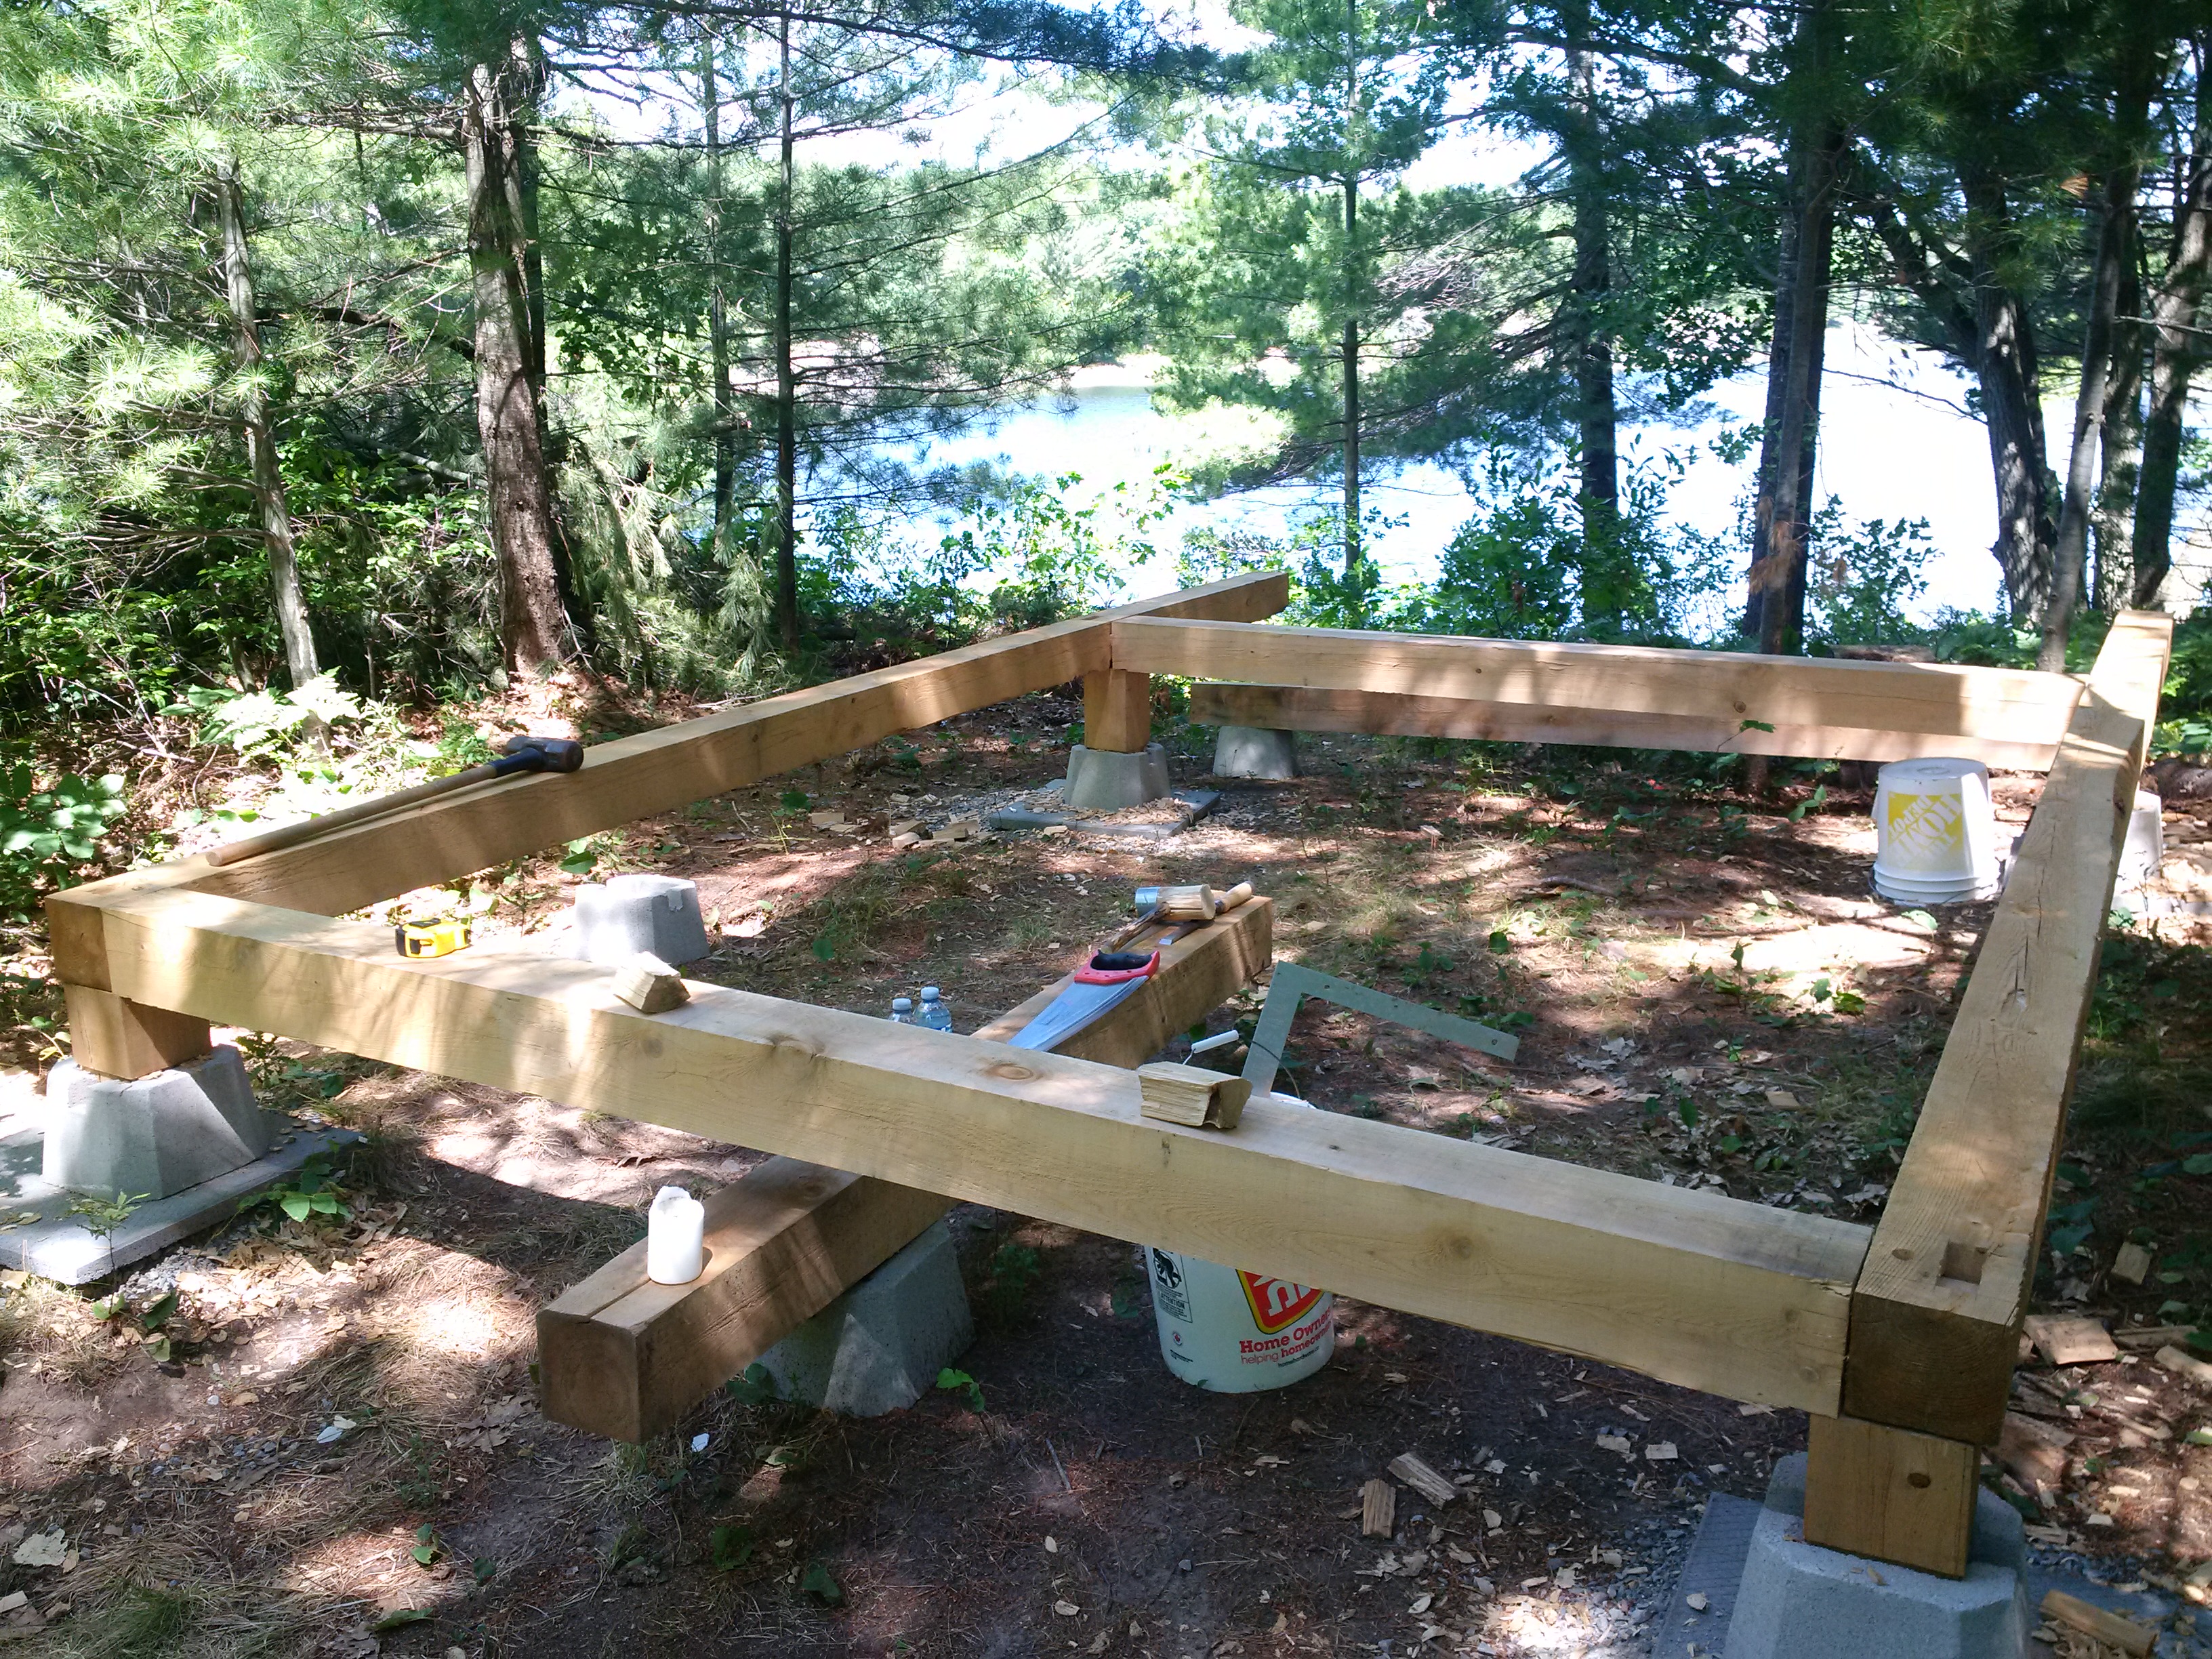
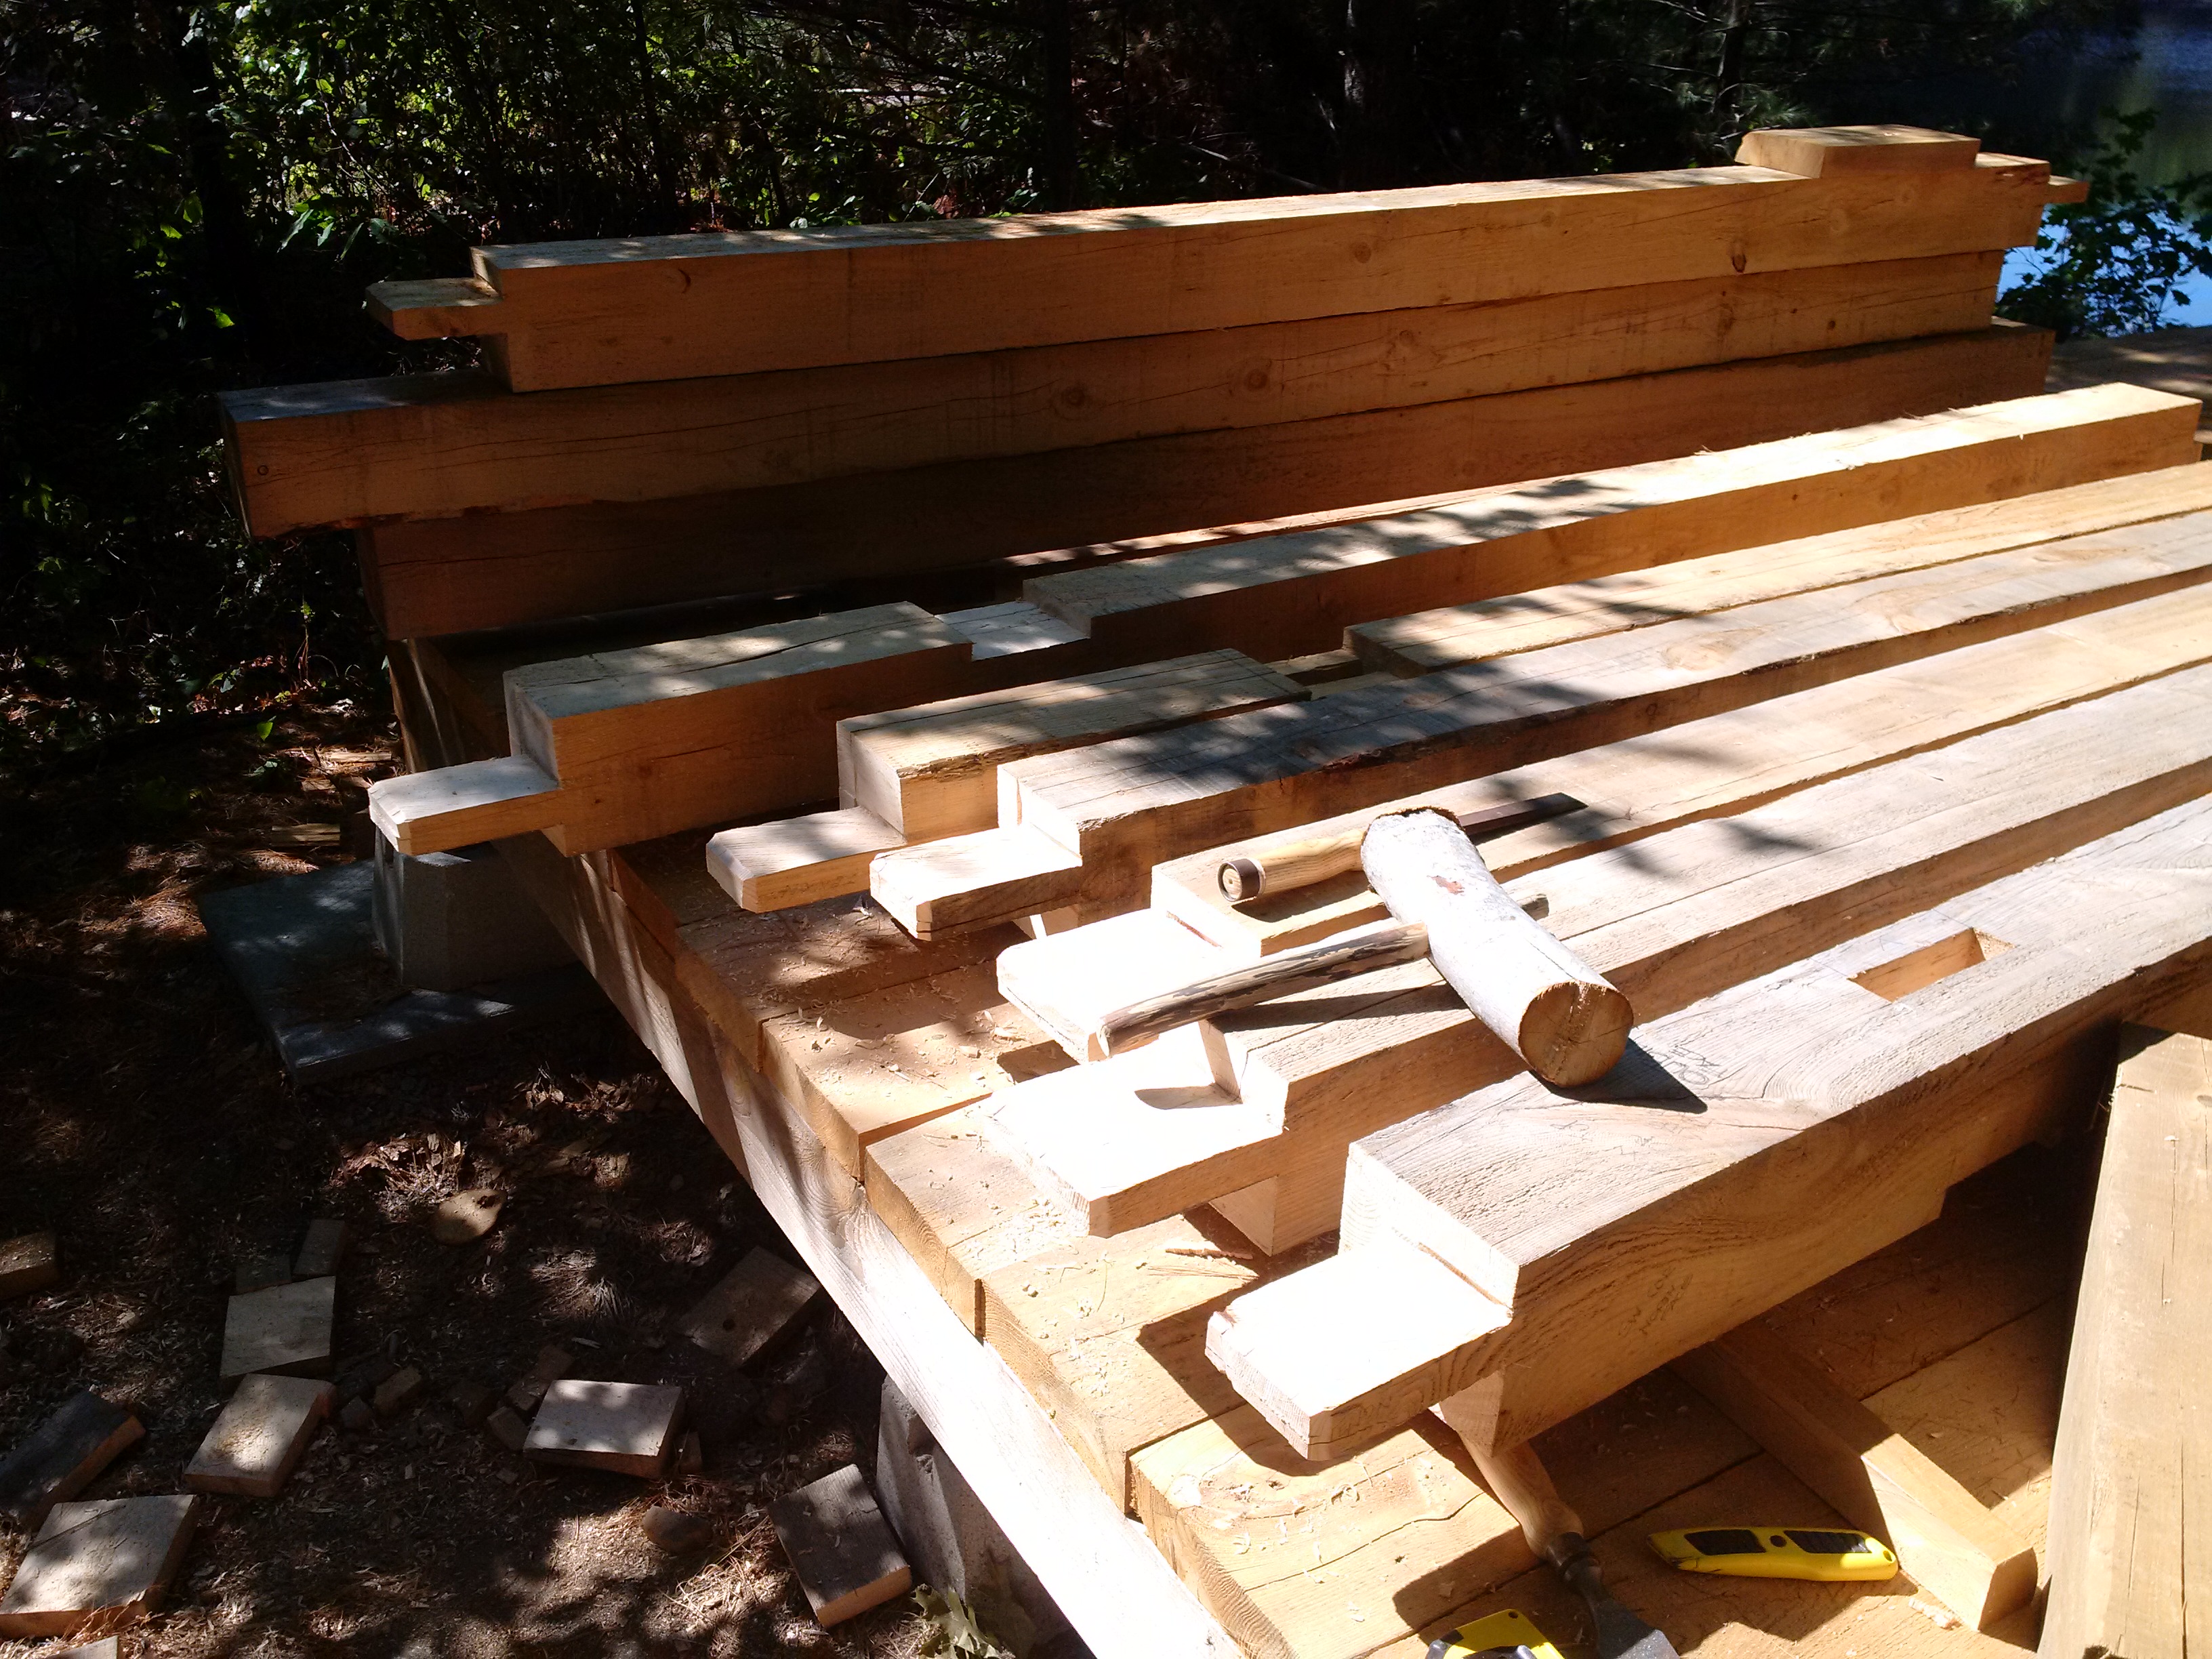
 To start the mini barn, the floor plate beams need to be set. The material is 6"x6" eastern hemlock from the local mill. Not all beams
turn out to be the exact 6x6 inches, so adjustments need to be made for each of the four main corner joints. For this project, the
corners are tied together using a pegged blind mortise and tenon, and the open slot in the top of the beam will accept the stub tenon
for the vertical post to be set later. Note that the holes augured for the peg are set at 1 1/2 inch from the tenon edge on the long beam
but 1 3/8 inches on the tenon of the cross beam so that the two will be drawn tightly together. The pegs are dried hardwood (either birch or
maple branches bucked off trees that I've felled for firewood), and slightly proud of 1 inch in diameter. Once driven in, they are cut even
with the top of the beam. After the four corners have been tied together, additional supports are set under the beams at the halfway points. A final support will be
set under the center joist just to give the middle of the floor some added strength. You have to make sure that you have a solid underpinning
to the floor beams; you don't want the structure to sag over time.
To start the mini barn, the floor plate beams need to be set. The material is 6"x6" eastern hemlock from the local mill. Not all beams
turn out to be the exact 6x6 inches, so adjustments need to be made for each of the four main corner joints. For this project, the
corners are tied together using a pegged blind mortise and tenon, and the open slot in the top of the beam will accept the stub tenon
for the vertical post to be set later. Note that the holes augured for the peg are set at 1 1/2 inch from the tenon edge on the long beam
but 1 3/8 inches on the tenon of the cross beam so that the two will be drawn tightly together. The pegs are dried hardwood (either birch or
maple branches bucked off trees that I've felled for firewood), and slightly proud of 1 inch in diameter. Once driven in, they are cut even
with the top of the beam. After the four corners have been tied together, additional supports are set under the beams at the halfway points. A final support will be
set under the center joist just to give the middle of the floor some added strength. You have to make sure that you have a solid underpinning
to the floor beams; you don't want the structure to sag over time.
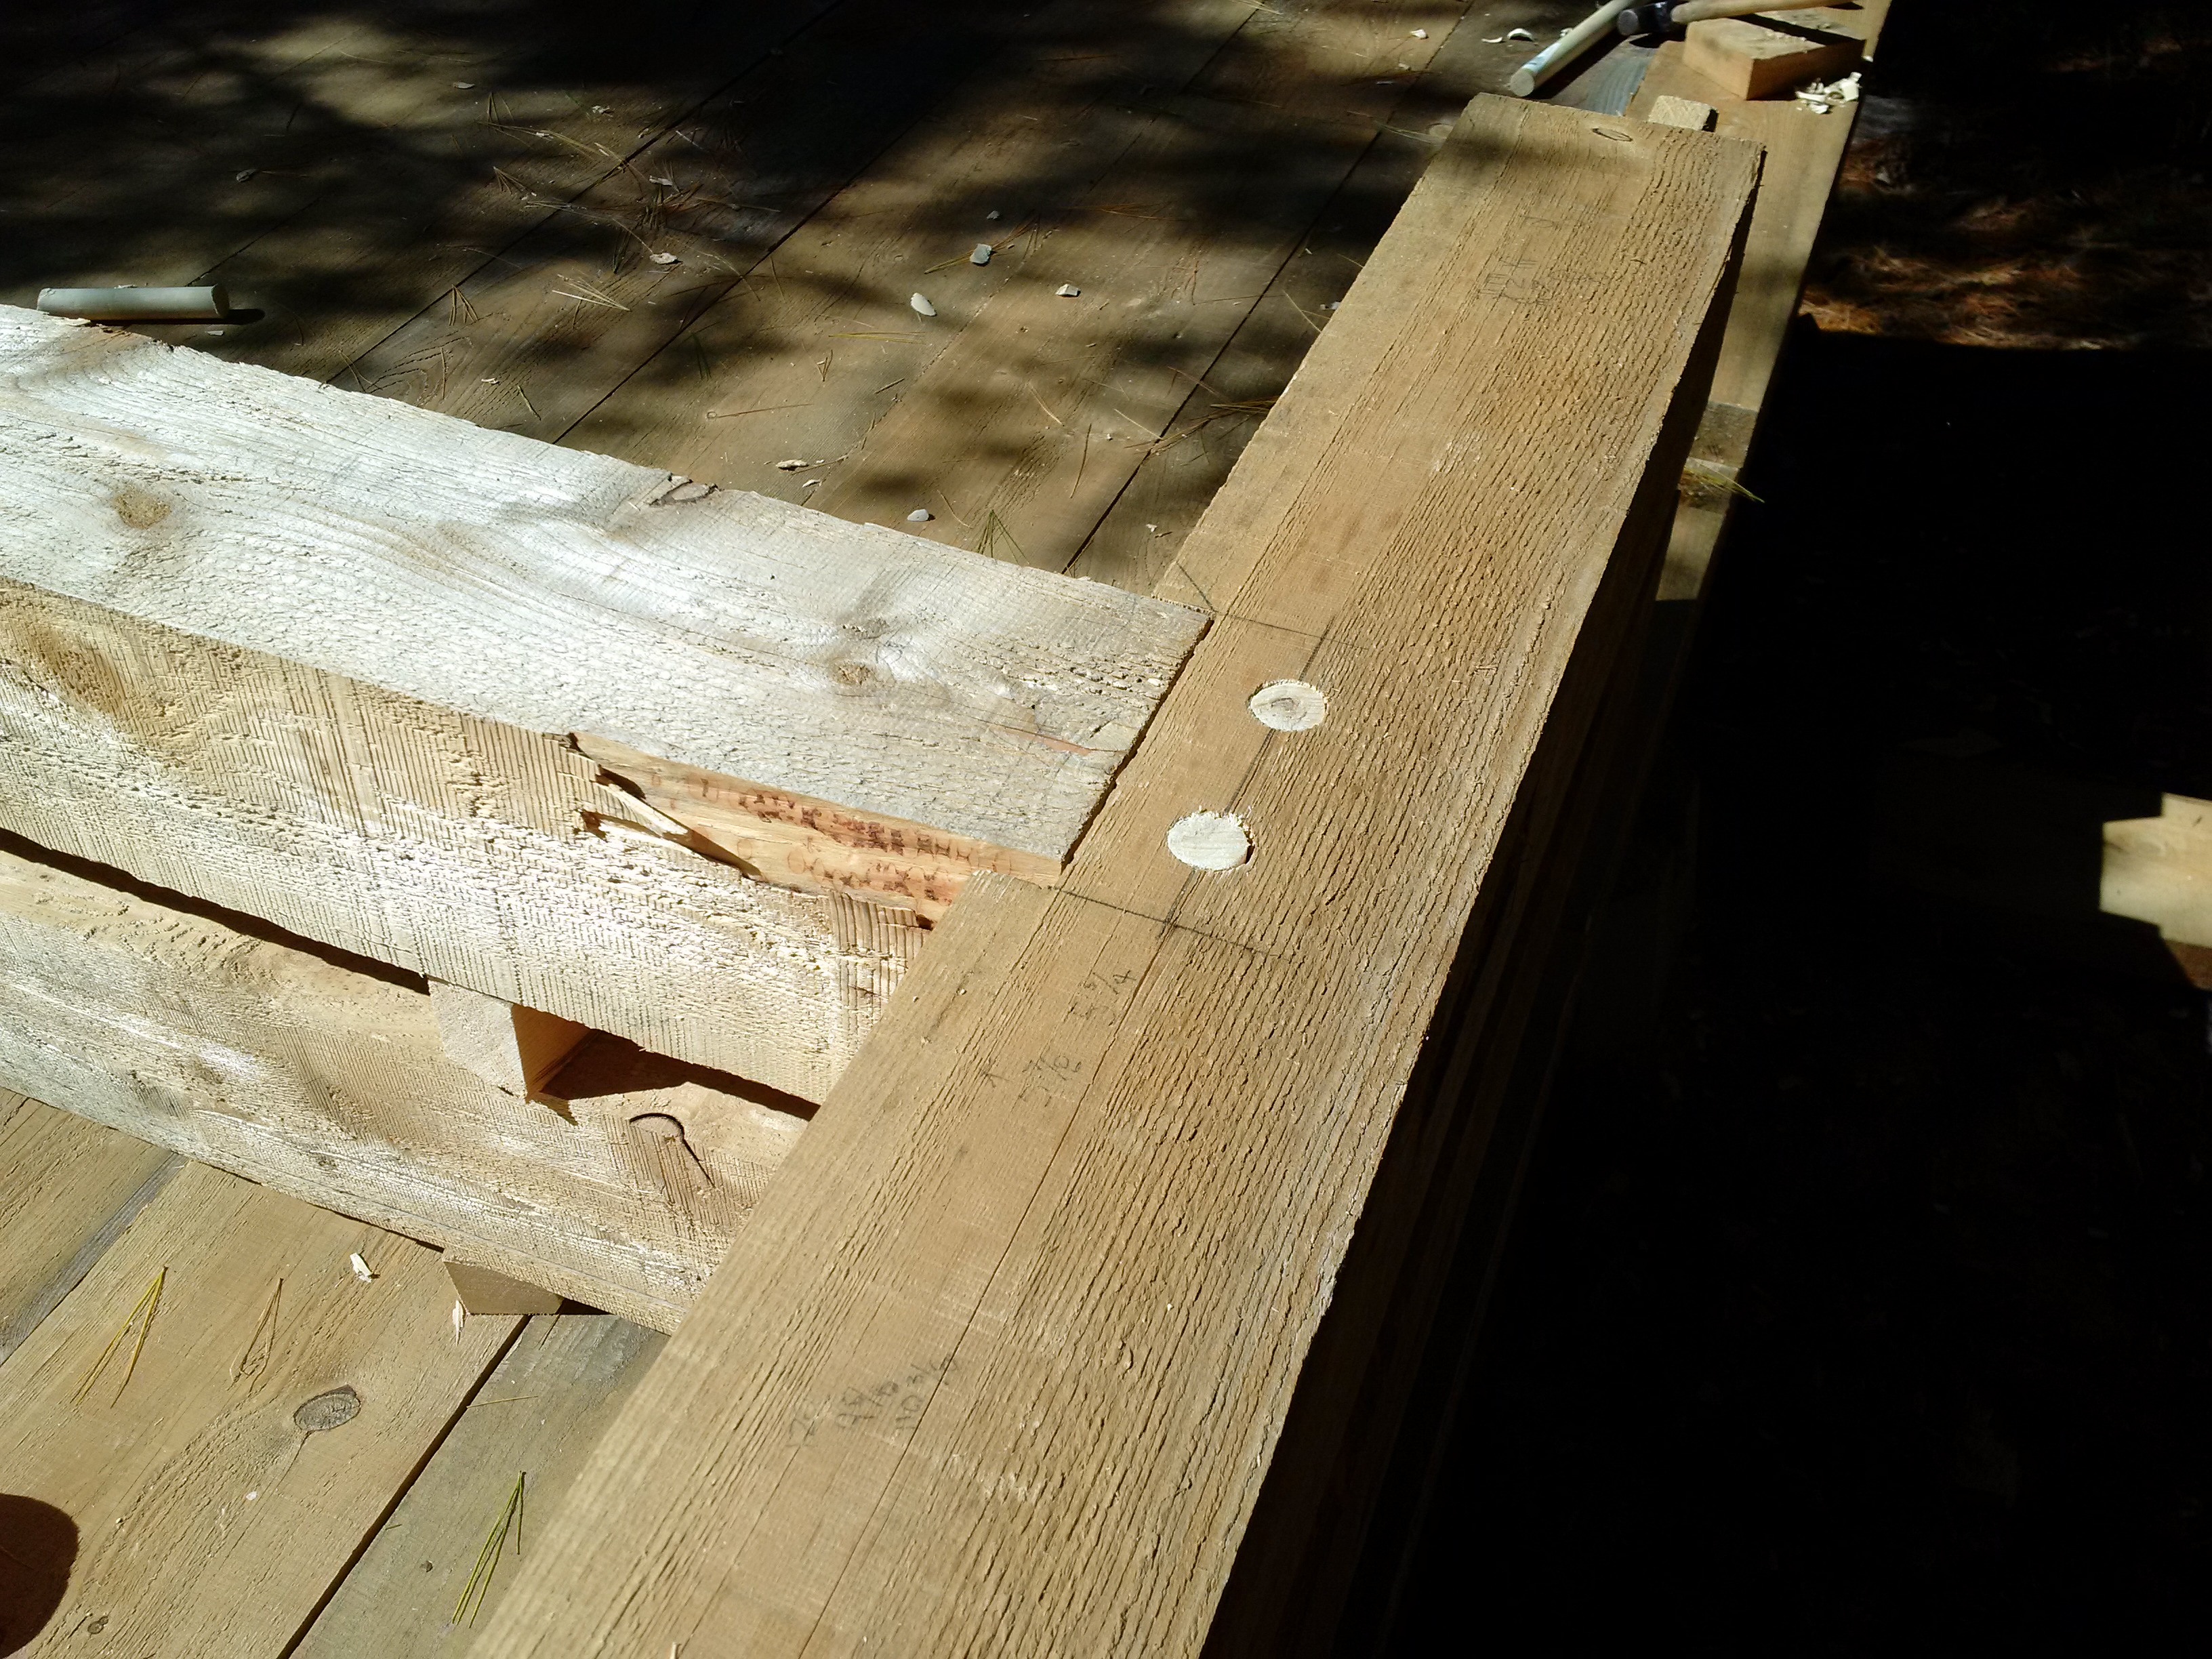
The pictures to the left and below show how the blind mortise & tenon comes together and is pegged. The peg hole on the tenon is offset slightly so that when the peg is driven in the tenon is drawn into the mortise tight; as the wood continues to dry the peg will be locked in place and the whole joint will remain snug. The open mortise on top of the main side beam will accept a short stub tenon on the bottom of each of the 6 main posts.

Joists
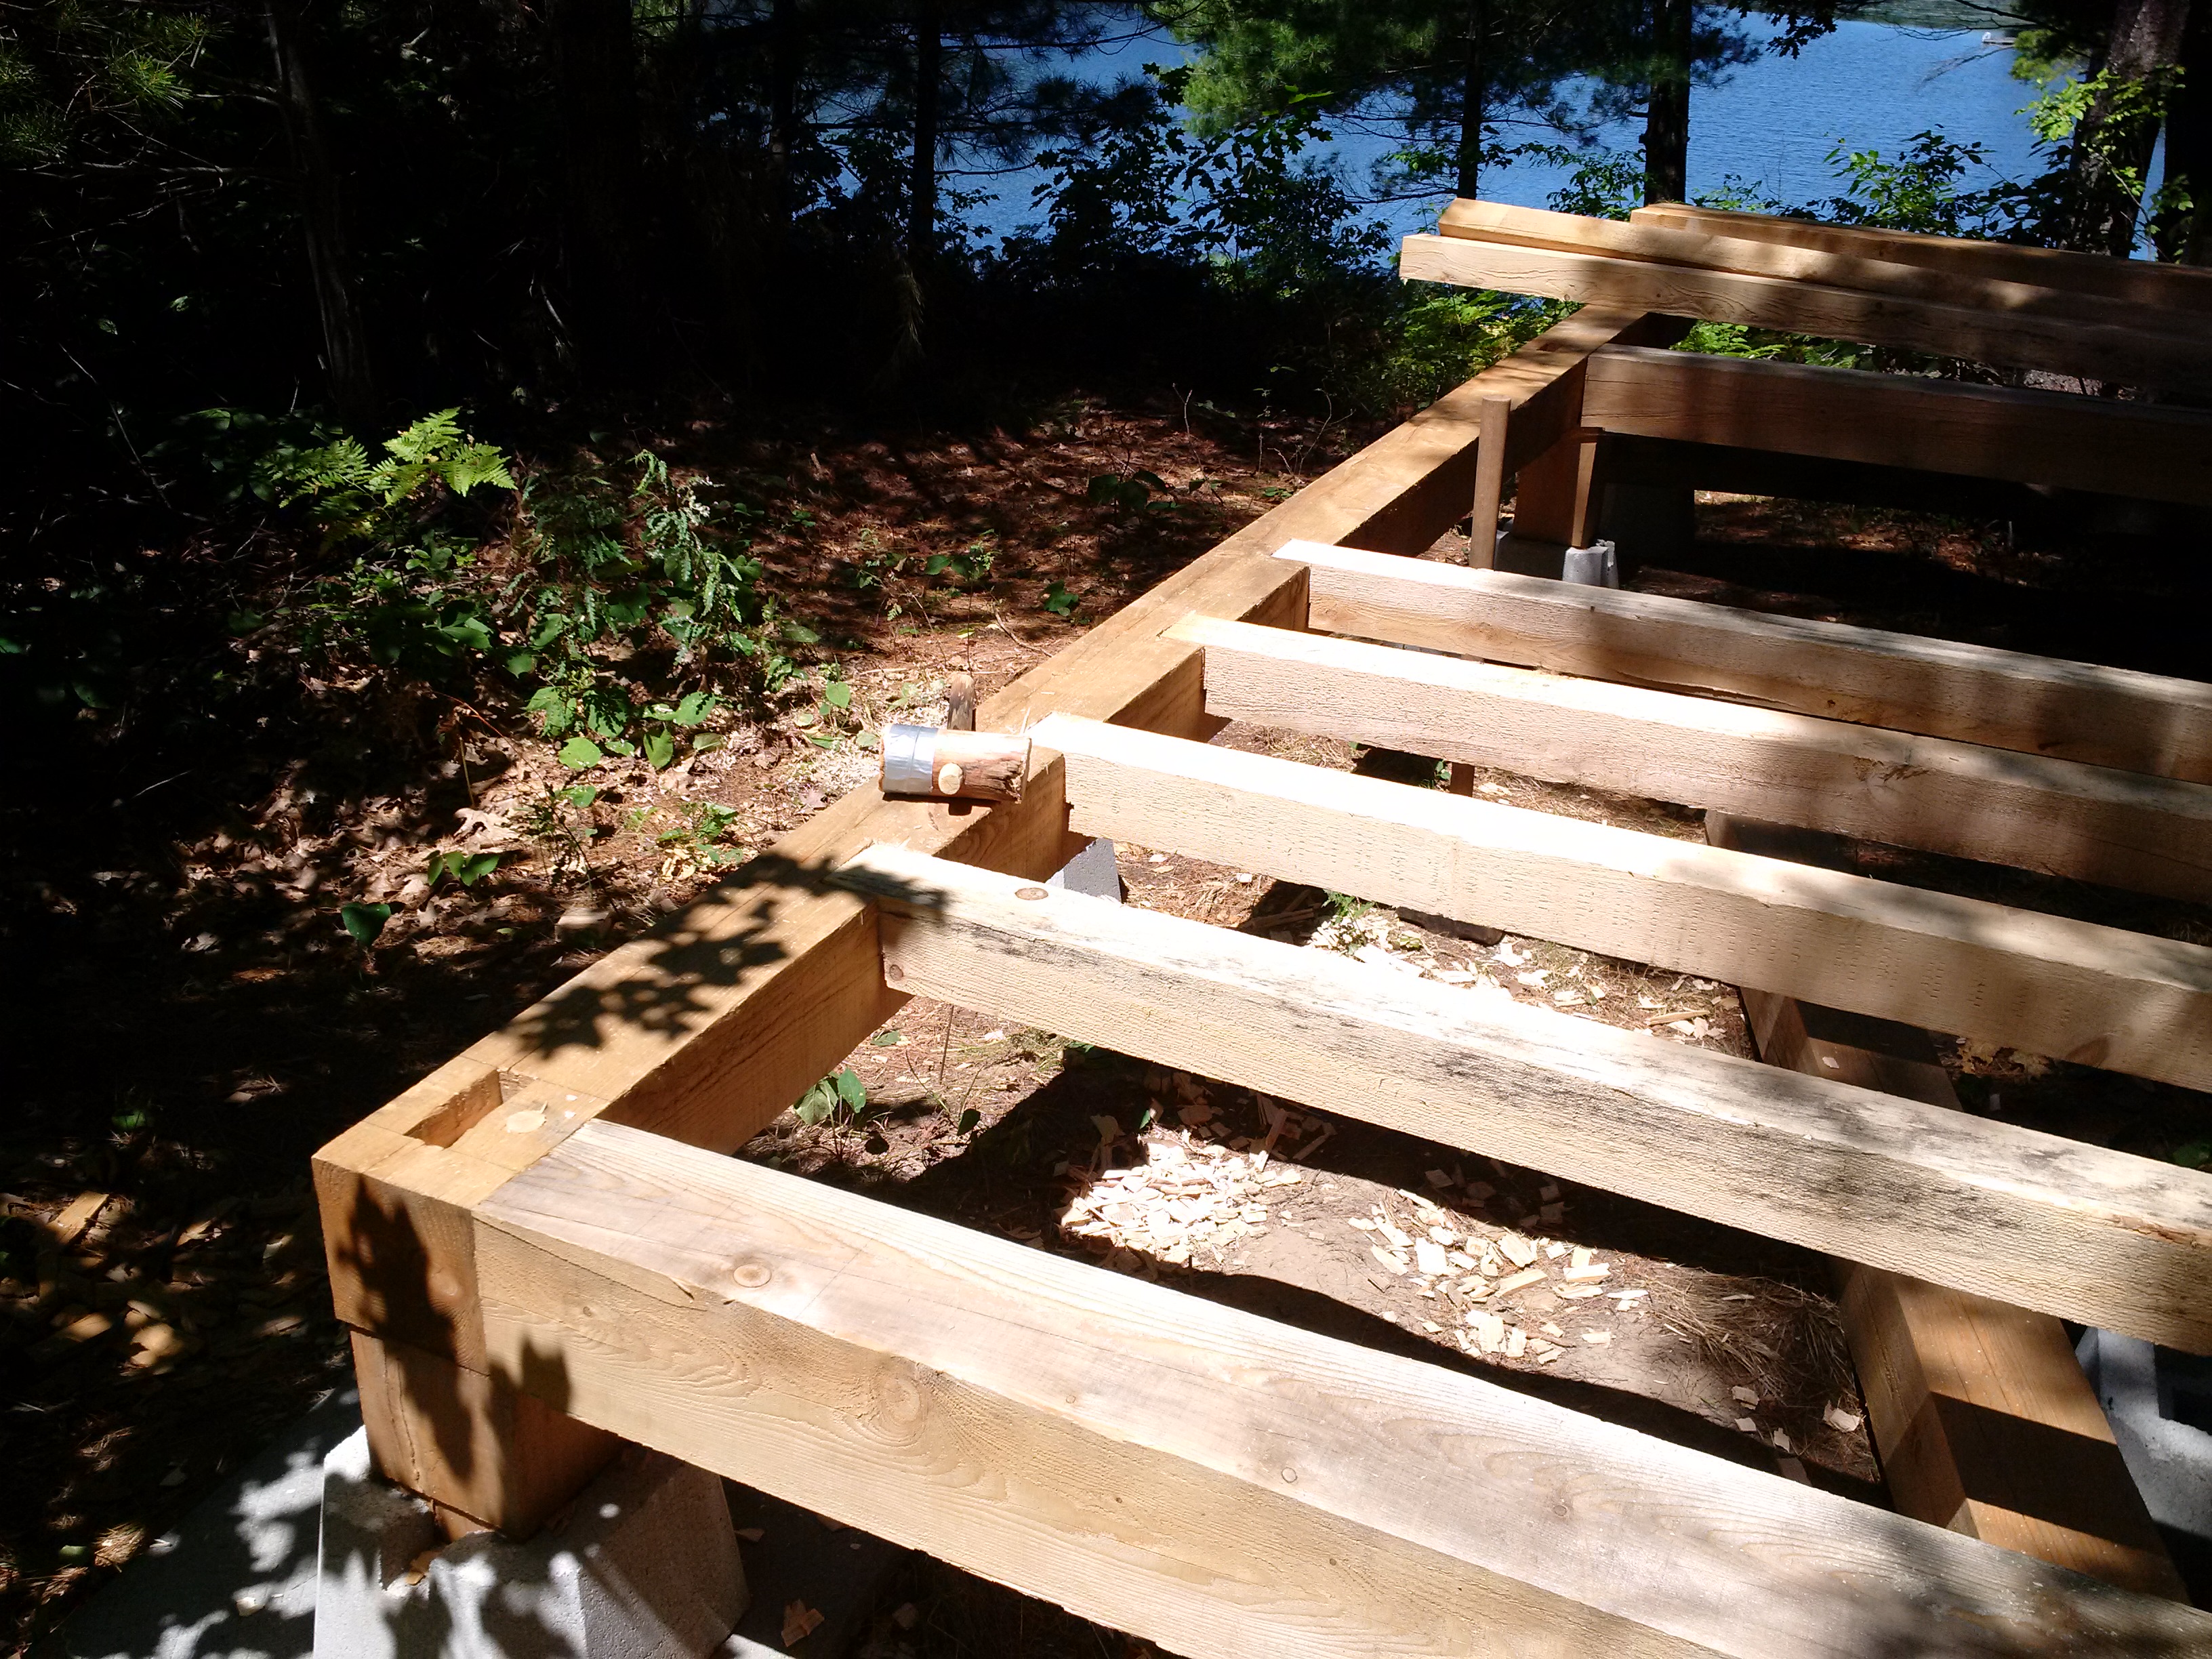 The joists are again eastern hemlock, cut to 4x4 inches and set close together (11 inches on center) since they are spanning a width of 9'. The flooring running perpendicular to the joists will help to prevent sagging, but the addition of a central support in the middle of the
floor as well as at the midpoints of the floor beams will provide even more added stability so there isn't any sagging over time. There
can be some concern about the pith (the center core of the log) when using a 4"x4" as a joist member - an option is to use 4"x6" hardwood
- but if you're careful with your selection of lumber at the mill, and are sure to get all the crowns skyward, then generally there's
nothing to worry about.
The joists are again eastern hemlock, cut to 4x4 inches and set close together (11 inches on center) since they are spanning a width of 9'. The flooring running perpendicular to the joists will help to prevent sagging, but the addition of a central support in the middle of the
floor as well as at the midpoints of the floor beams will provide even more added stability so there isn't any sagging over time. There
can be some concern about the pith (the center core of the log) when using a 4"x4" as a joist member - an option is to use 4"x6" hardwood
- but if you're careful with your selection of lumber at the mill, and are sure to get all the crowns skyward, then generally there's
nothing to worry about.
Floor
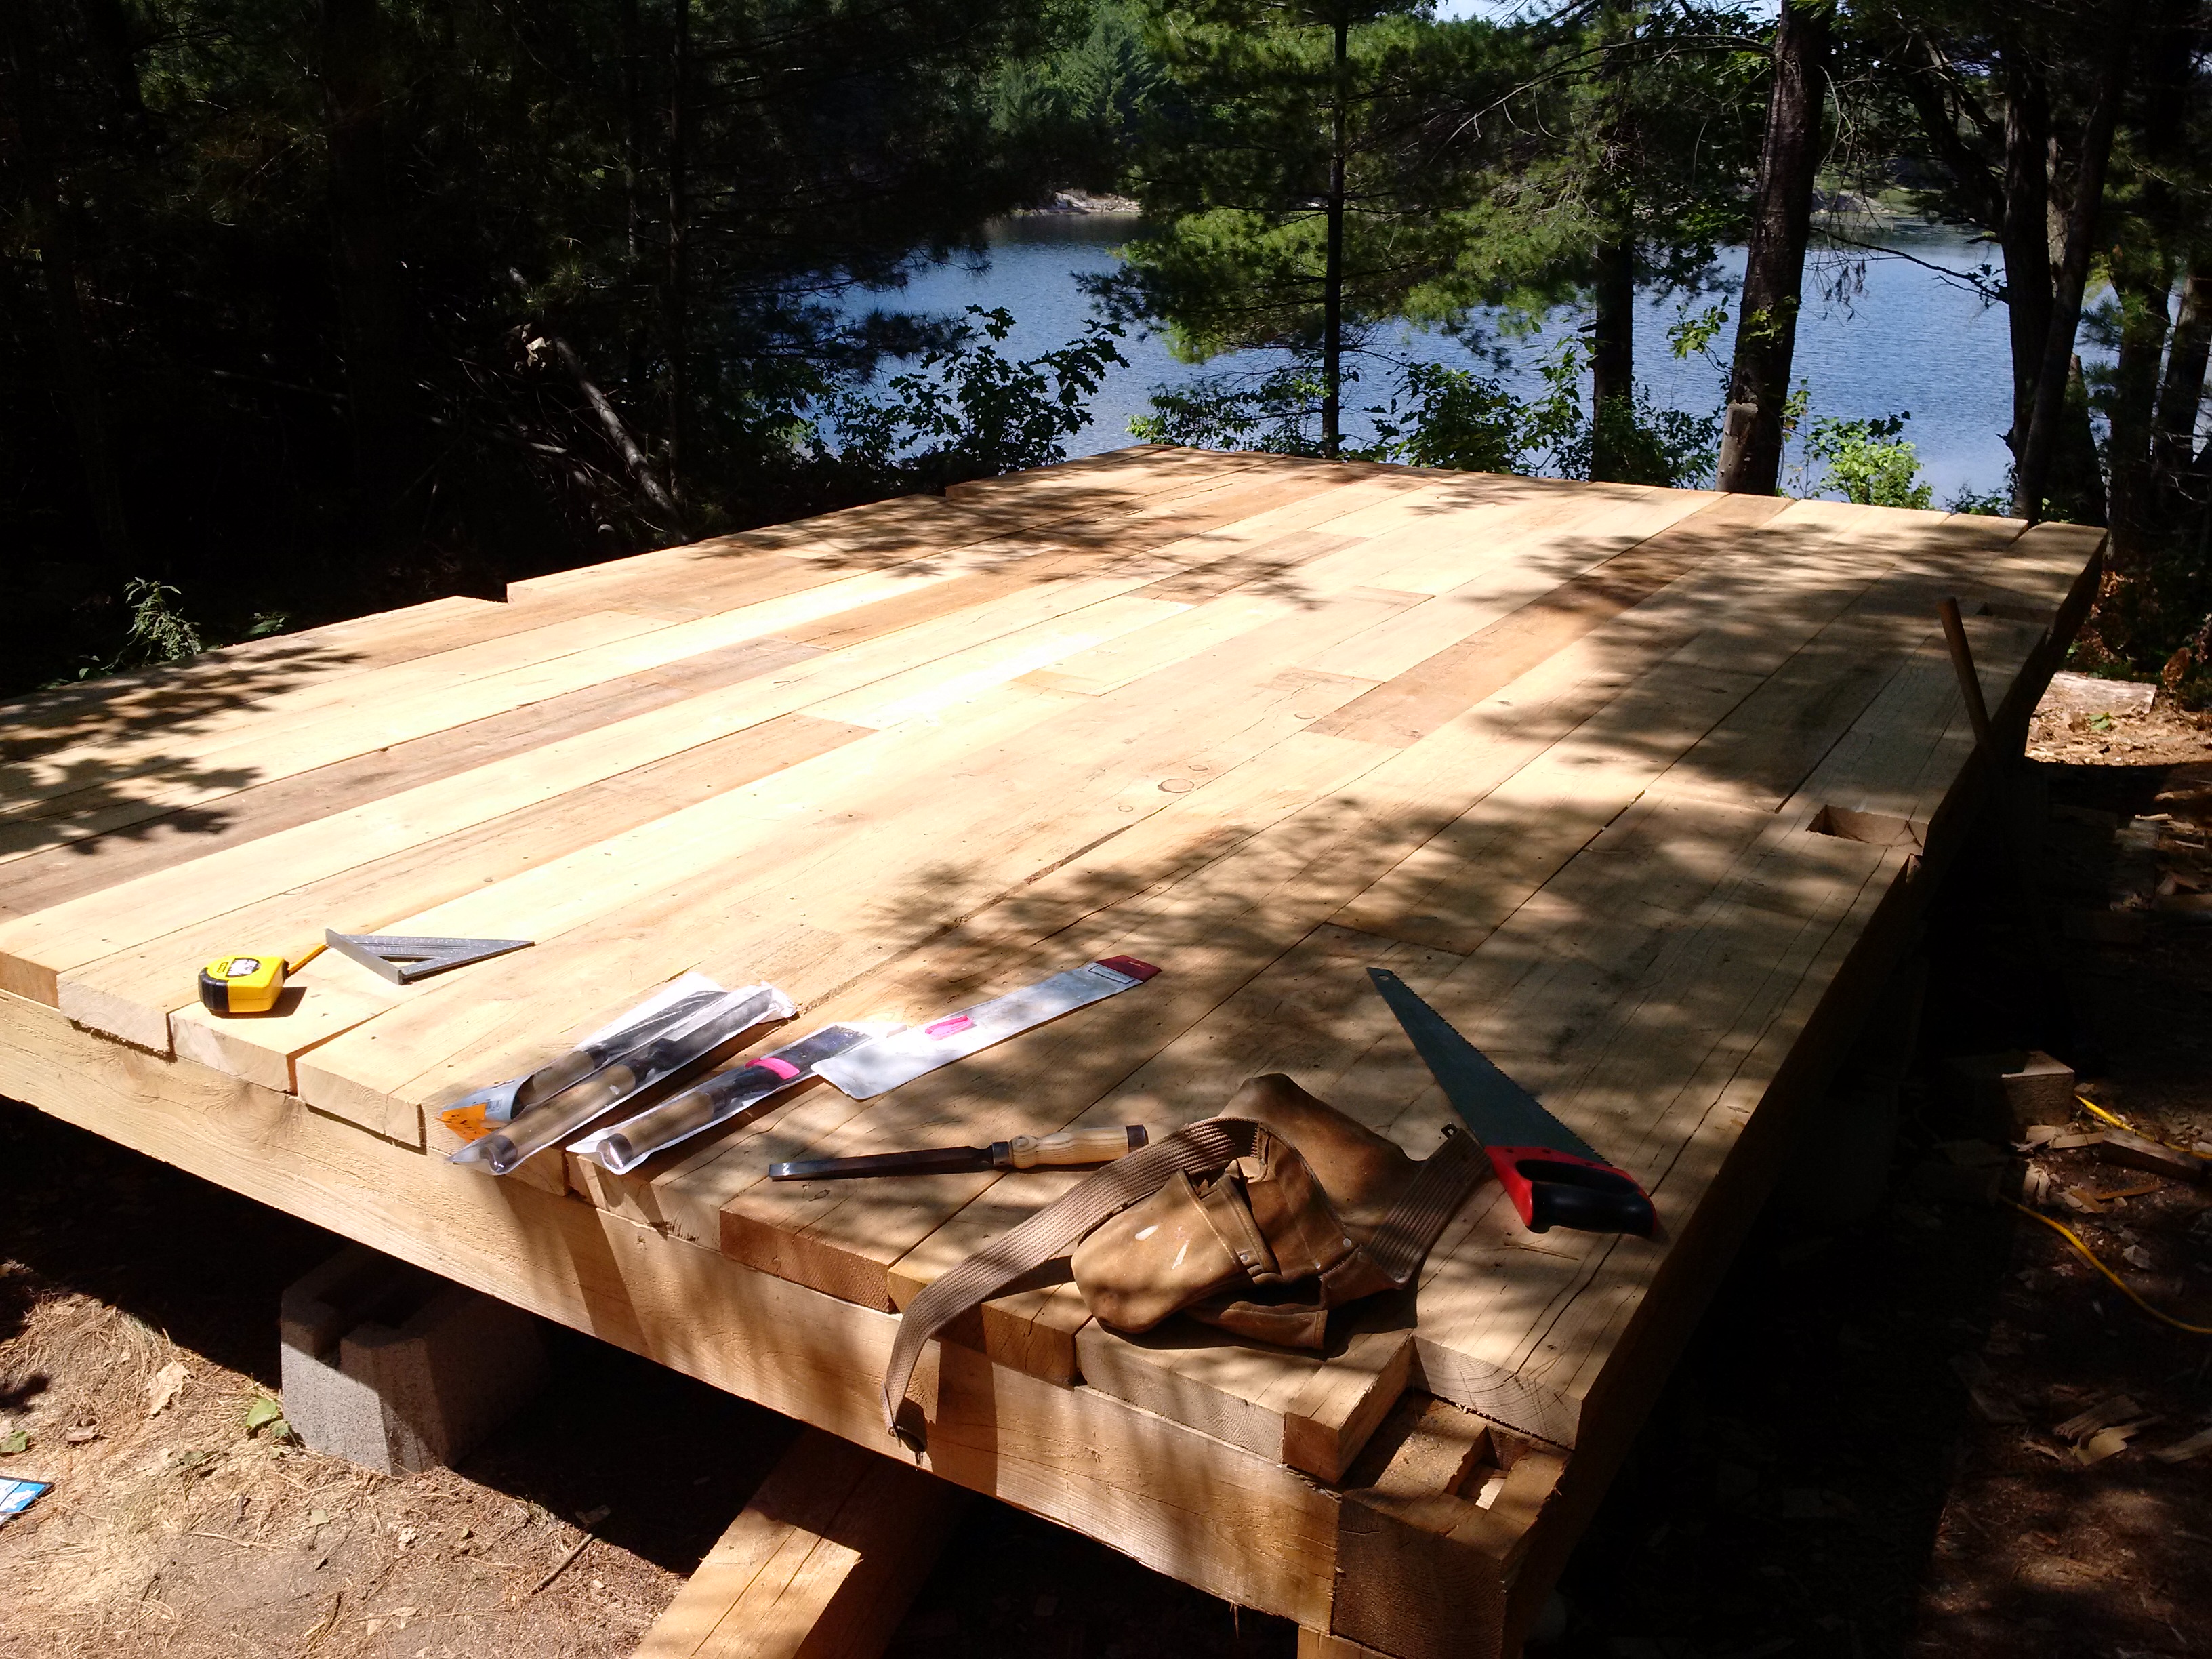 Next step was to set the floor. Using full dimension 2"x8"x10' hemlock rough sawn boards, they were simply screwed down (yes, first break
from tradition), making sure not to have any two butt joints lined up on adjacent courses. Some of the boards were not perfectly straight,
so I used a strap and rachet hooked to either a nearby tree or the floor beams to coax them. The hope was to eliminate any gaps between the
boards since they were not milled with a tongue and groove. This is a barn. And so long as the critters can't get in, I'm happy. I will
send a teenager underneath one day to chicken wire the under side, just to stop any unwanted visitors from chewing their way in...
Next step was to set the floor. Using full dimension 2"x8"x10' hemlock rough sawn boards, they were simply screwed down (yes, first break
from tradition), making sure not to have any two butt joints lined up on adjacent courses. Some of the boards were not perfectly straight,
so I used a strap and rachet hooked to either a nearby tree or the floor beams to coax them. The hope was to eliminate any gaps between the
boards since they were not milled with a tongue and groove. This is a barn. And so long as the critters can't get in, I'm happy. I will
send a teenager underneath one day to chicken wire the under side, just to stop any unwanted visitors from chewing their way in...
Once the floor was completed, I carved out the post pockets for the bents.
Bents
 The exterior walls and roof are supported by 3 bents with a top beam connecting the top of the bent posts on the long side of the barn. A bent is a simple, sturdy 'H' frame with braces to ensure they remain square and rigid. The crossbeam of the bent is set lower than the top of the vertical posts. That provides the option to lay a floor on the crossbeams to creat loft space with enough headroom that I can stand up. The crossbeam's lower position also allows for the braces connecting the top beams to the bent posts not to interfere with the braces on the bents themselves.
The bents are again made from 6x6 eastern hemlock, and the braces are 4x4 eastern hemlock. The posts for the bents, from the foot of the post which sits on the sill beam to the top of the tenon cut into the top of the post, are 9' long. The bottom of each bent has a 1 1/2 inch stub tenon to fit into the mortises carved into the sill beams. Each of the top tenons are 1 1/2 inch thick and are 4 1/2 inches long (offset 1 1/2 inches from the gable wall ends) on the corners of the barn and 6 inches long on the middle two posts. The offset on the corners is so the joint is not visible from the outside, even though it will be covered by the exterior board & batten cladding. From the floor to the top of the bent crossbeam is 7'4 inches (leaving 6'10 inches of headroom inside the barn). So, 2' below the very top of the post a dado and mortise is cut to accept the end of the crossbeam and the crossbeam tenon - this adds extra support for the floor of the loft. Here you can see the 6x6's part way complete, before assembling into the bents.
After getting everything chiseled and checking the measurements one more time, the bents were assembled on the floor of the barn. At this point, trying to get them square is secondary to coaxing the crossbeams into the posts (you'll note the 12 lbs. sledgehammer used to help things along). You want the mortise and tenon joints to be tight, and because there is no machining of either part of the connection, candle wax or a thin coat of pure mineral oil on the mating surfaces does help. The one thing to always watch for is that there is no undue torsional or wrong-way stress on the tenon - you don't want one even cracking, so everything needs to stay lined up and level. In the second picture immediately below you can see the double pegged joint where the crossbeam slots into the post.
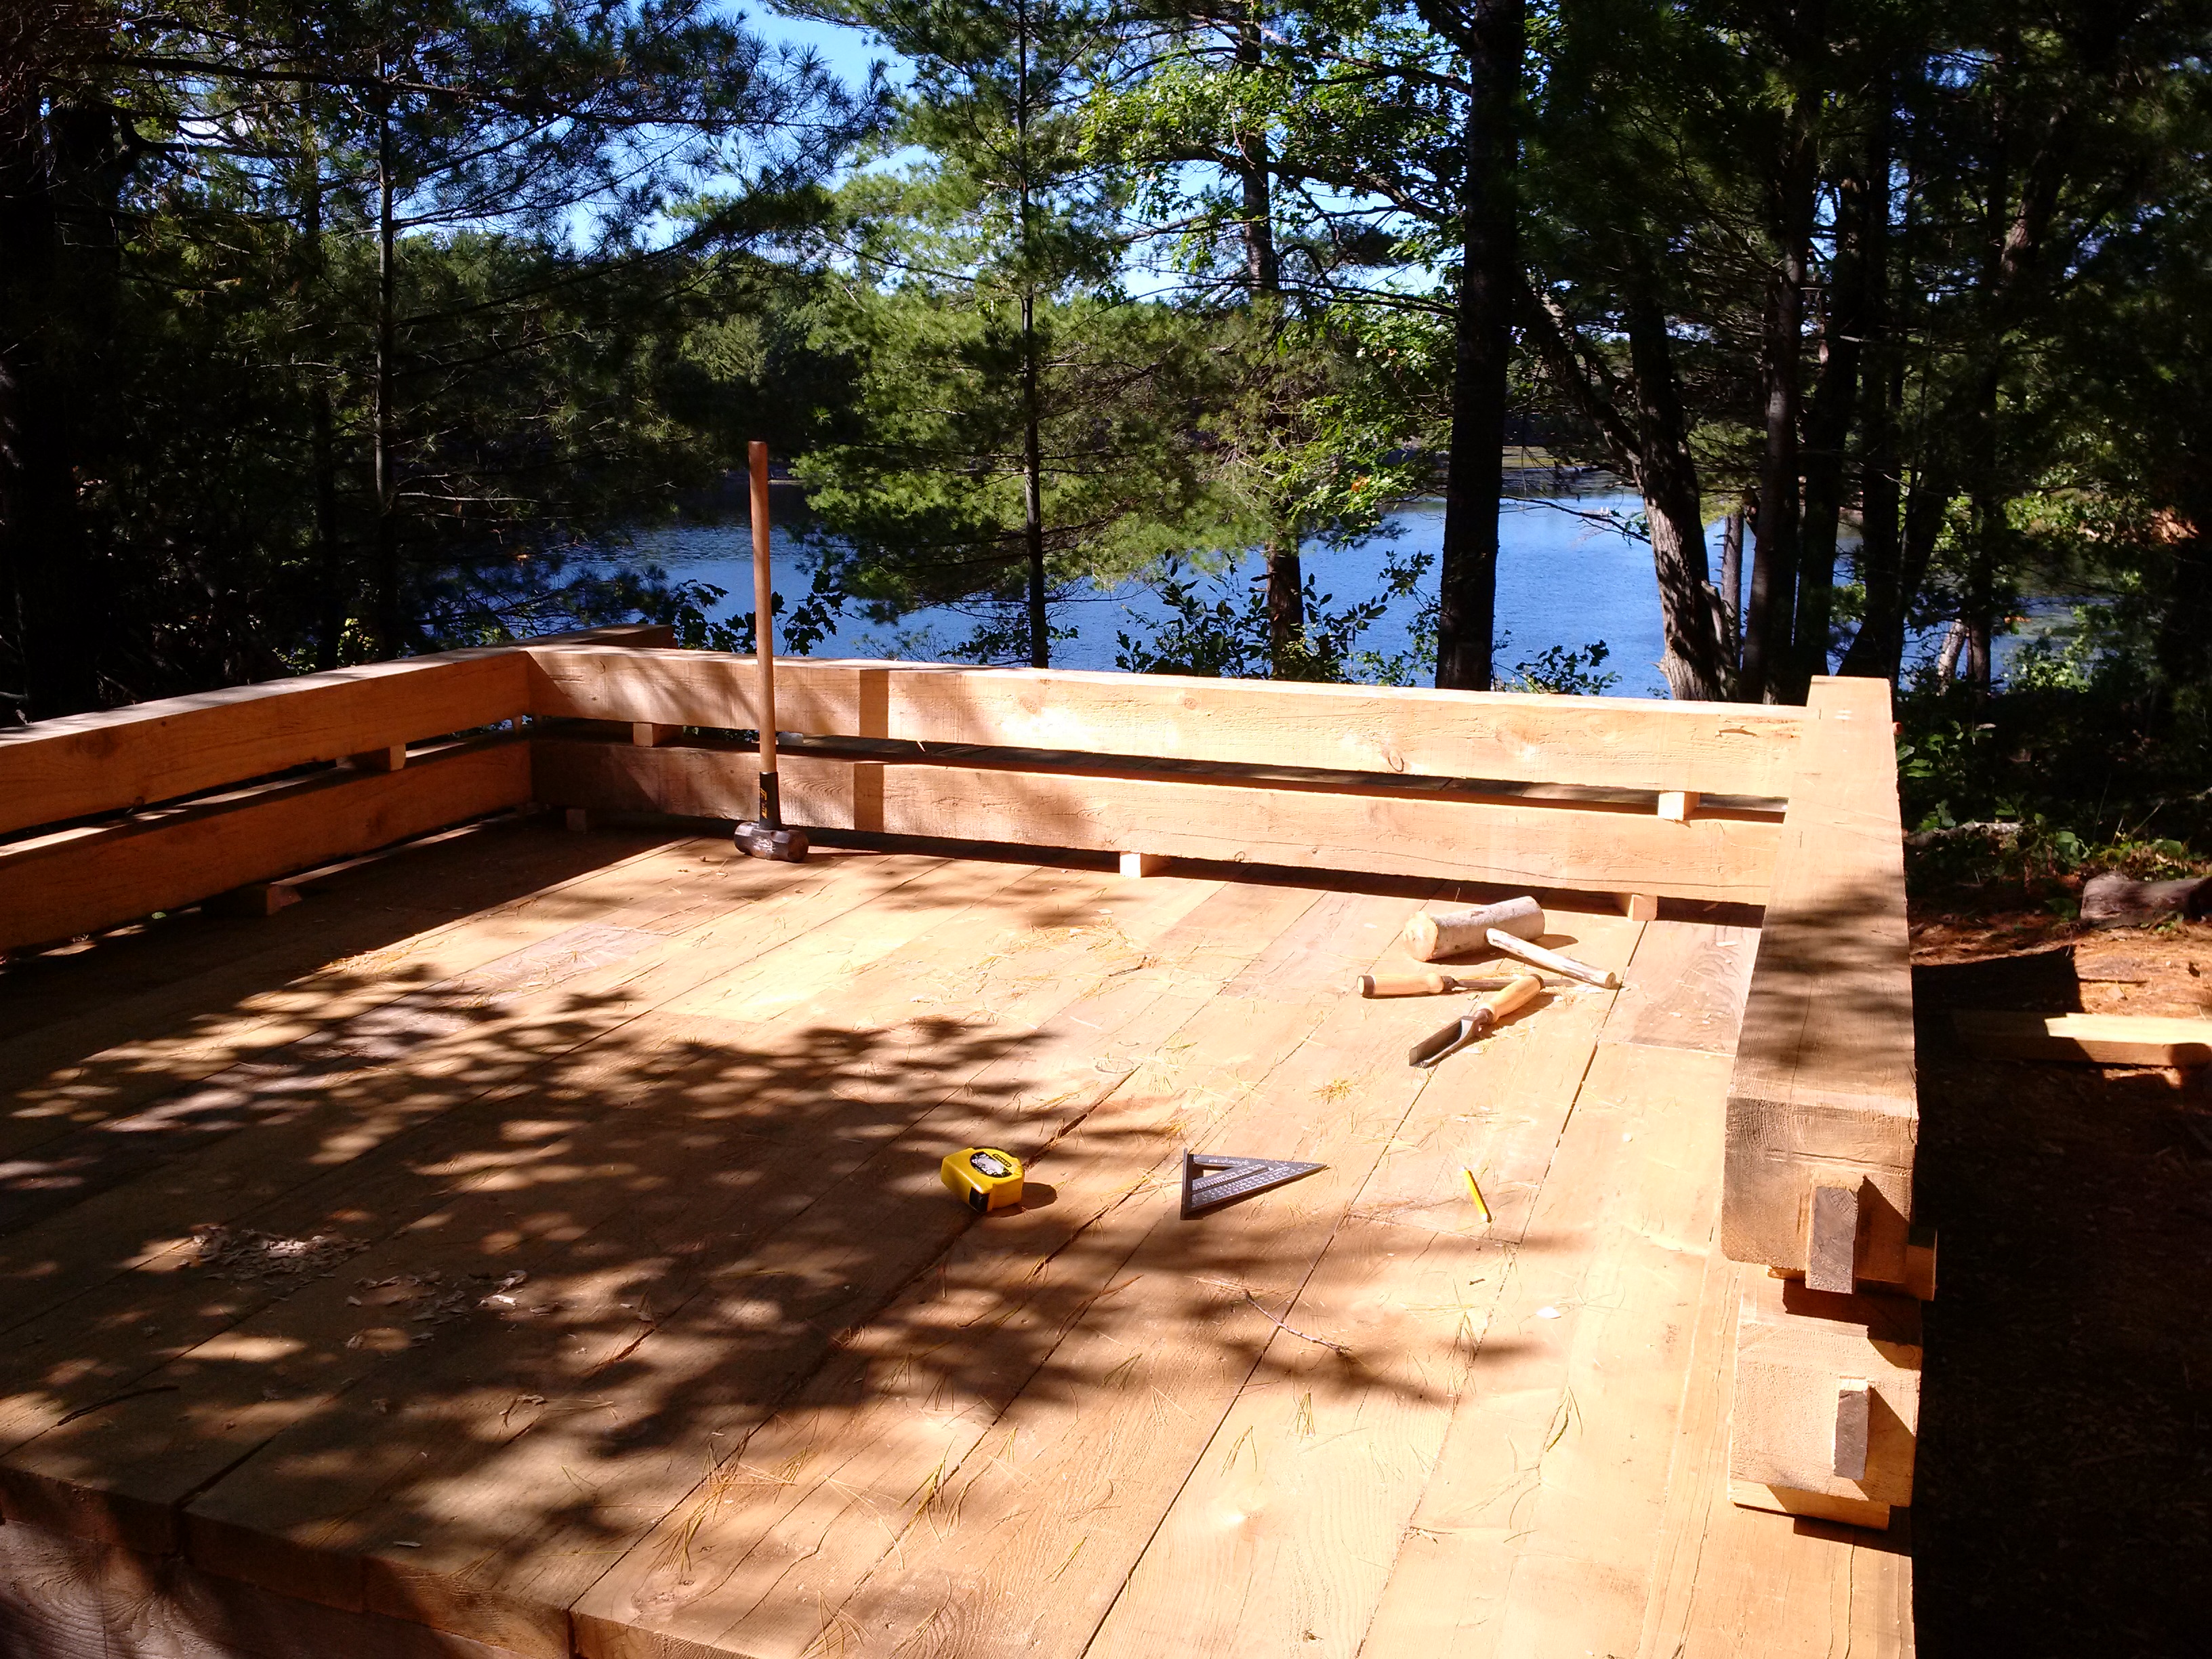
View
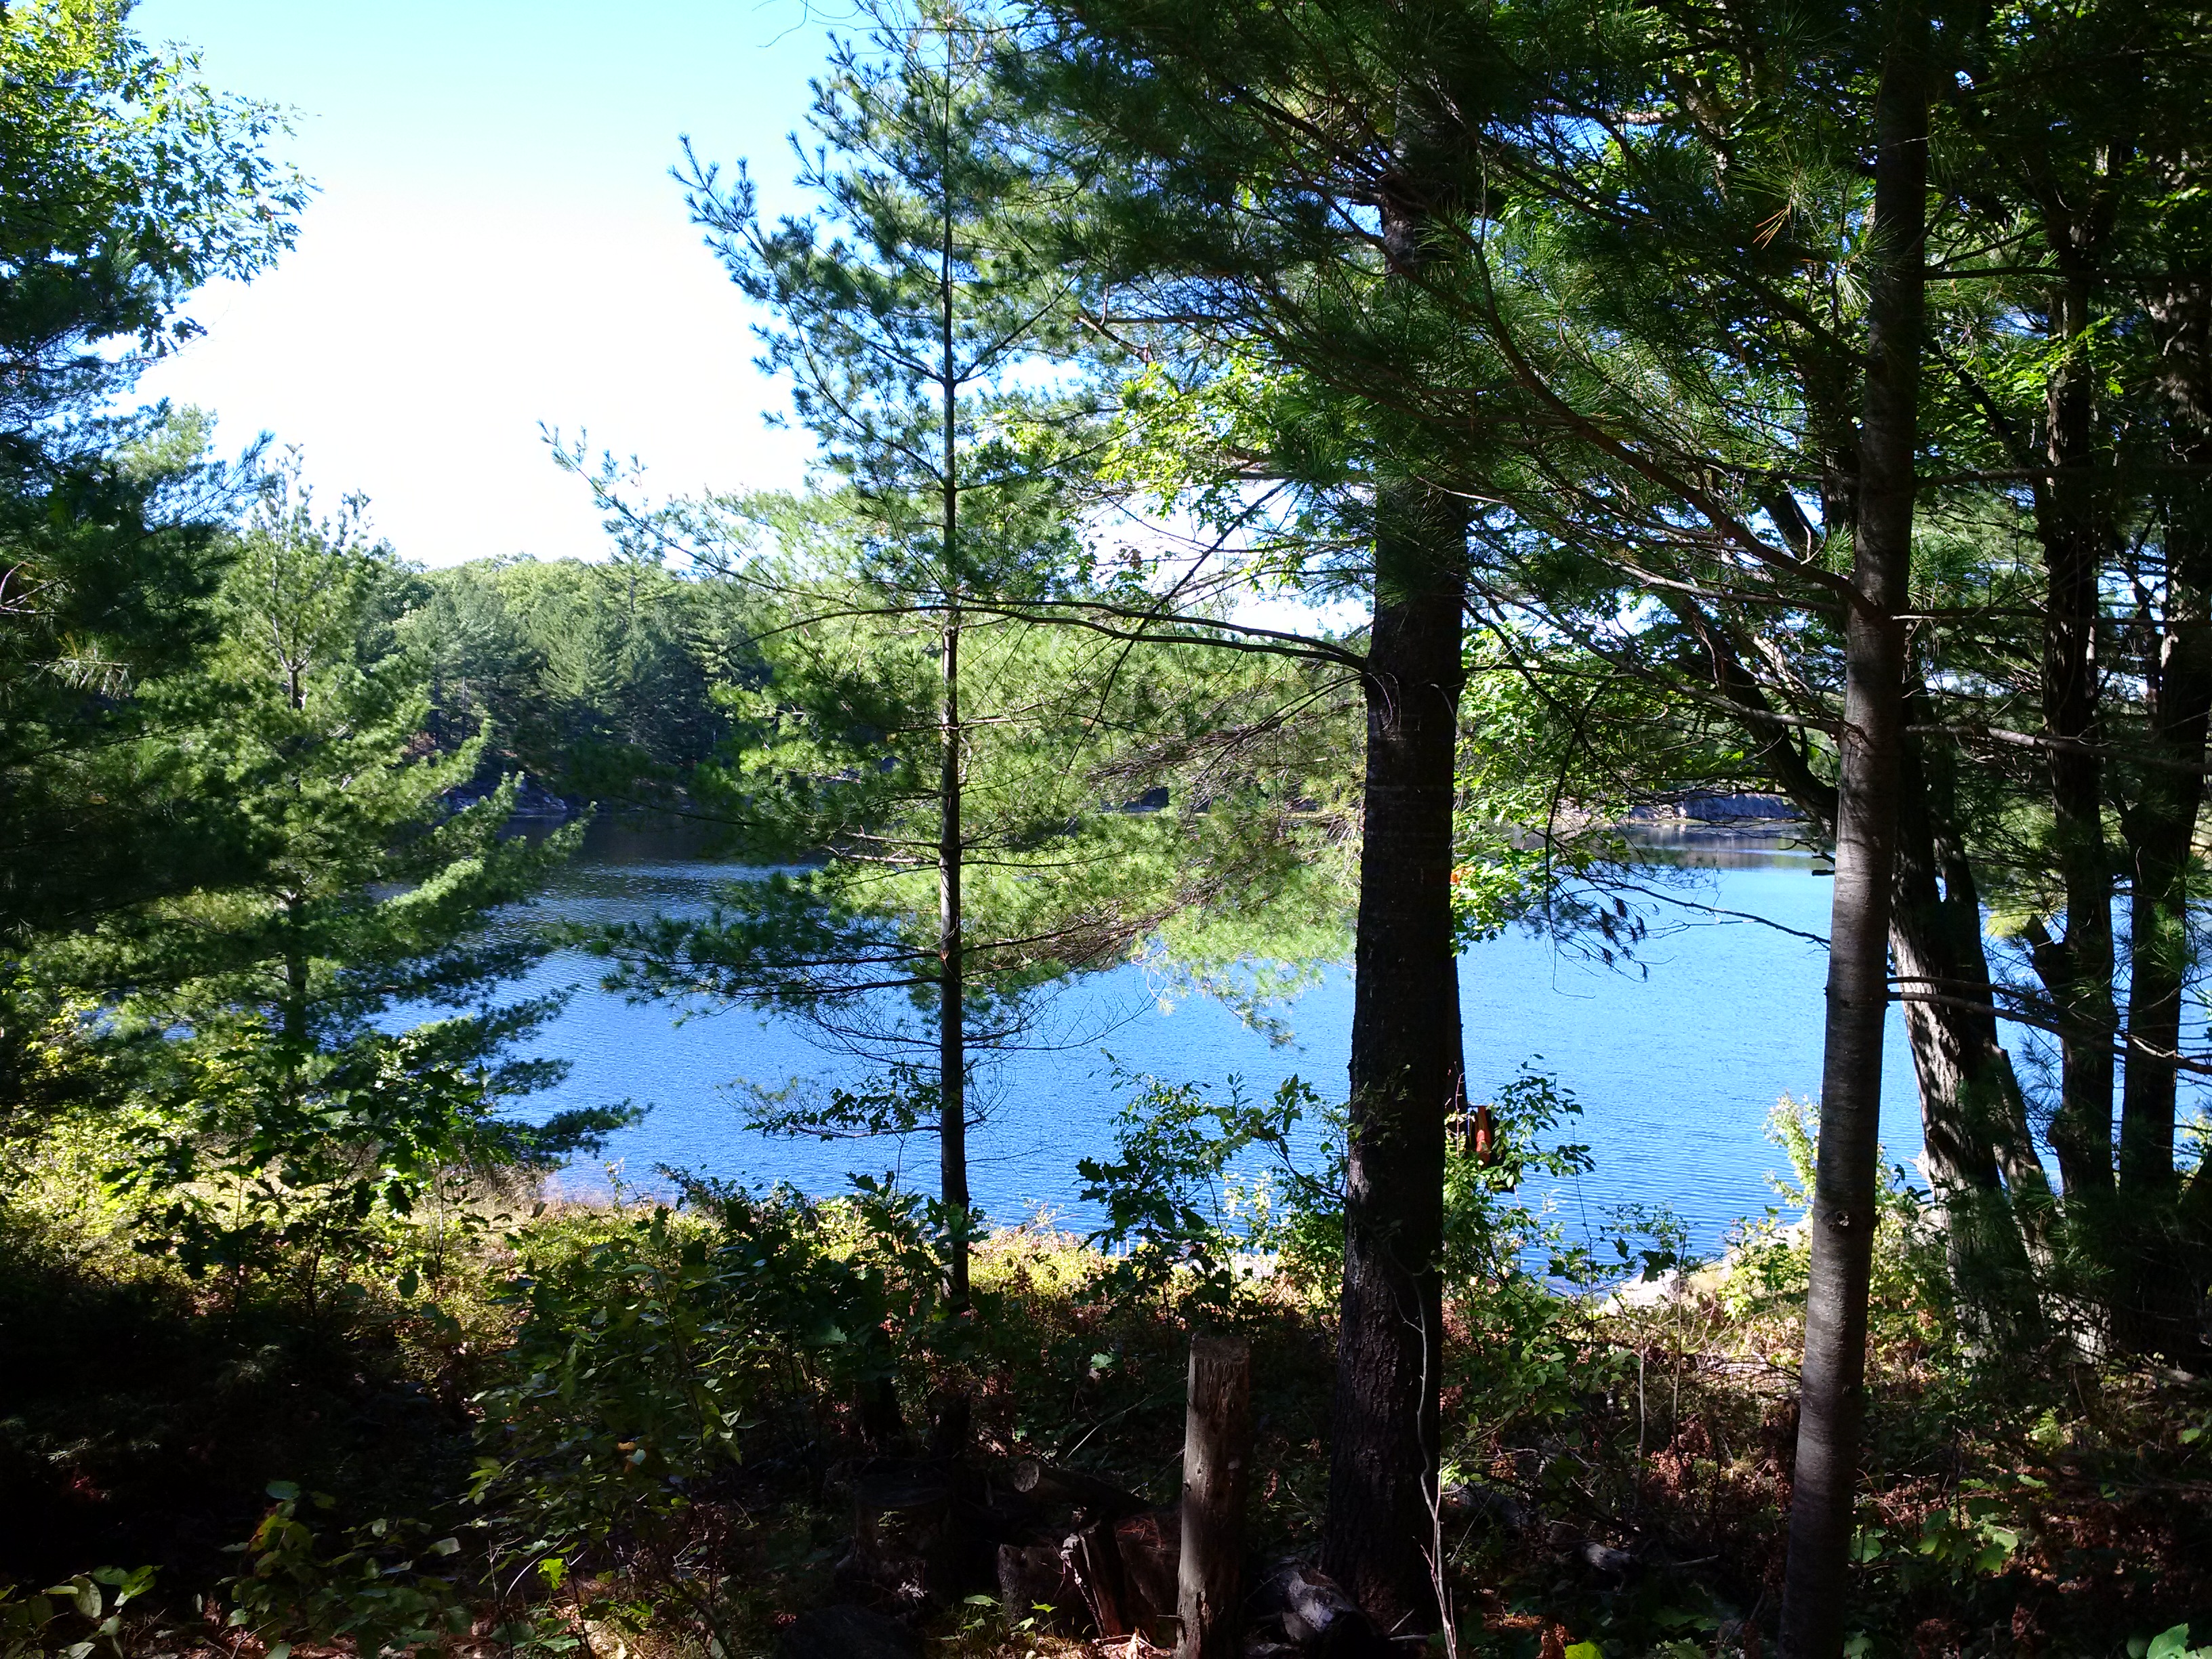 Every now and then, have a beer and enjoy the view. As a friend of mine said after describing the assembly of his big-box store pergola, 'Wow, this barn building really isn't a 2-hour job...' And he's right. It takes time, so when you get tired, you stop. Everything can cause you injury: chisels, large beams, saw teeth, etc. So stop when it's time to stop.
Bent Bracing
 With all three of the bents together and pegged, the next step is bracing them. The braces are at 45 degrees to the crossbeam and post, and the bottom of the brace is 2' from both the top of the cross beam and the outside of the post. The braces are let in to the post and crossbeam using a dado and corresponding notch on the brace. You can leave the braces proud, like I did for some, to raise the bents, or cut them flush now while they're on the ground.
Bent Raising
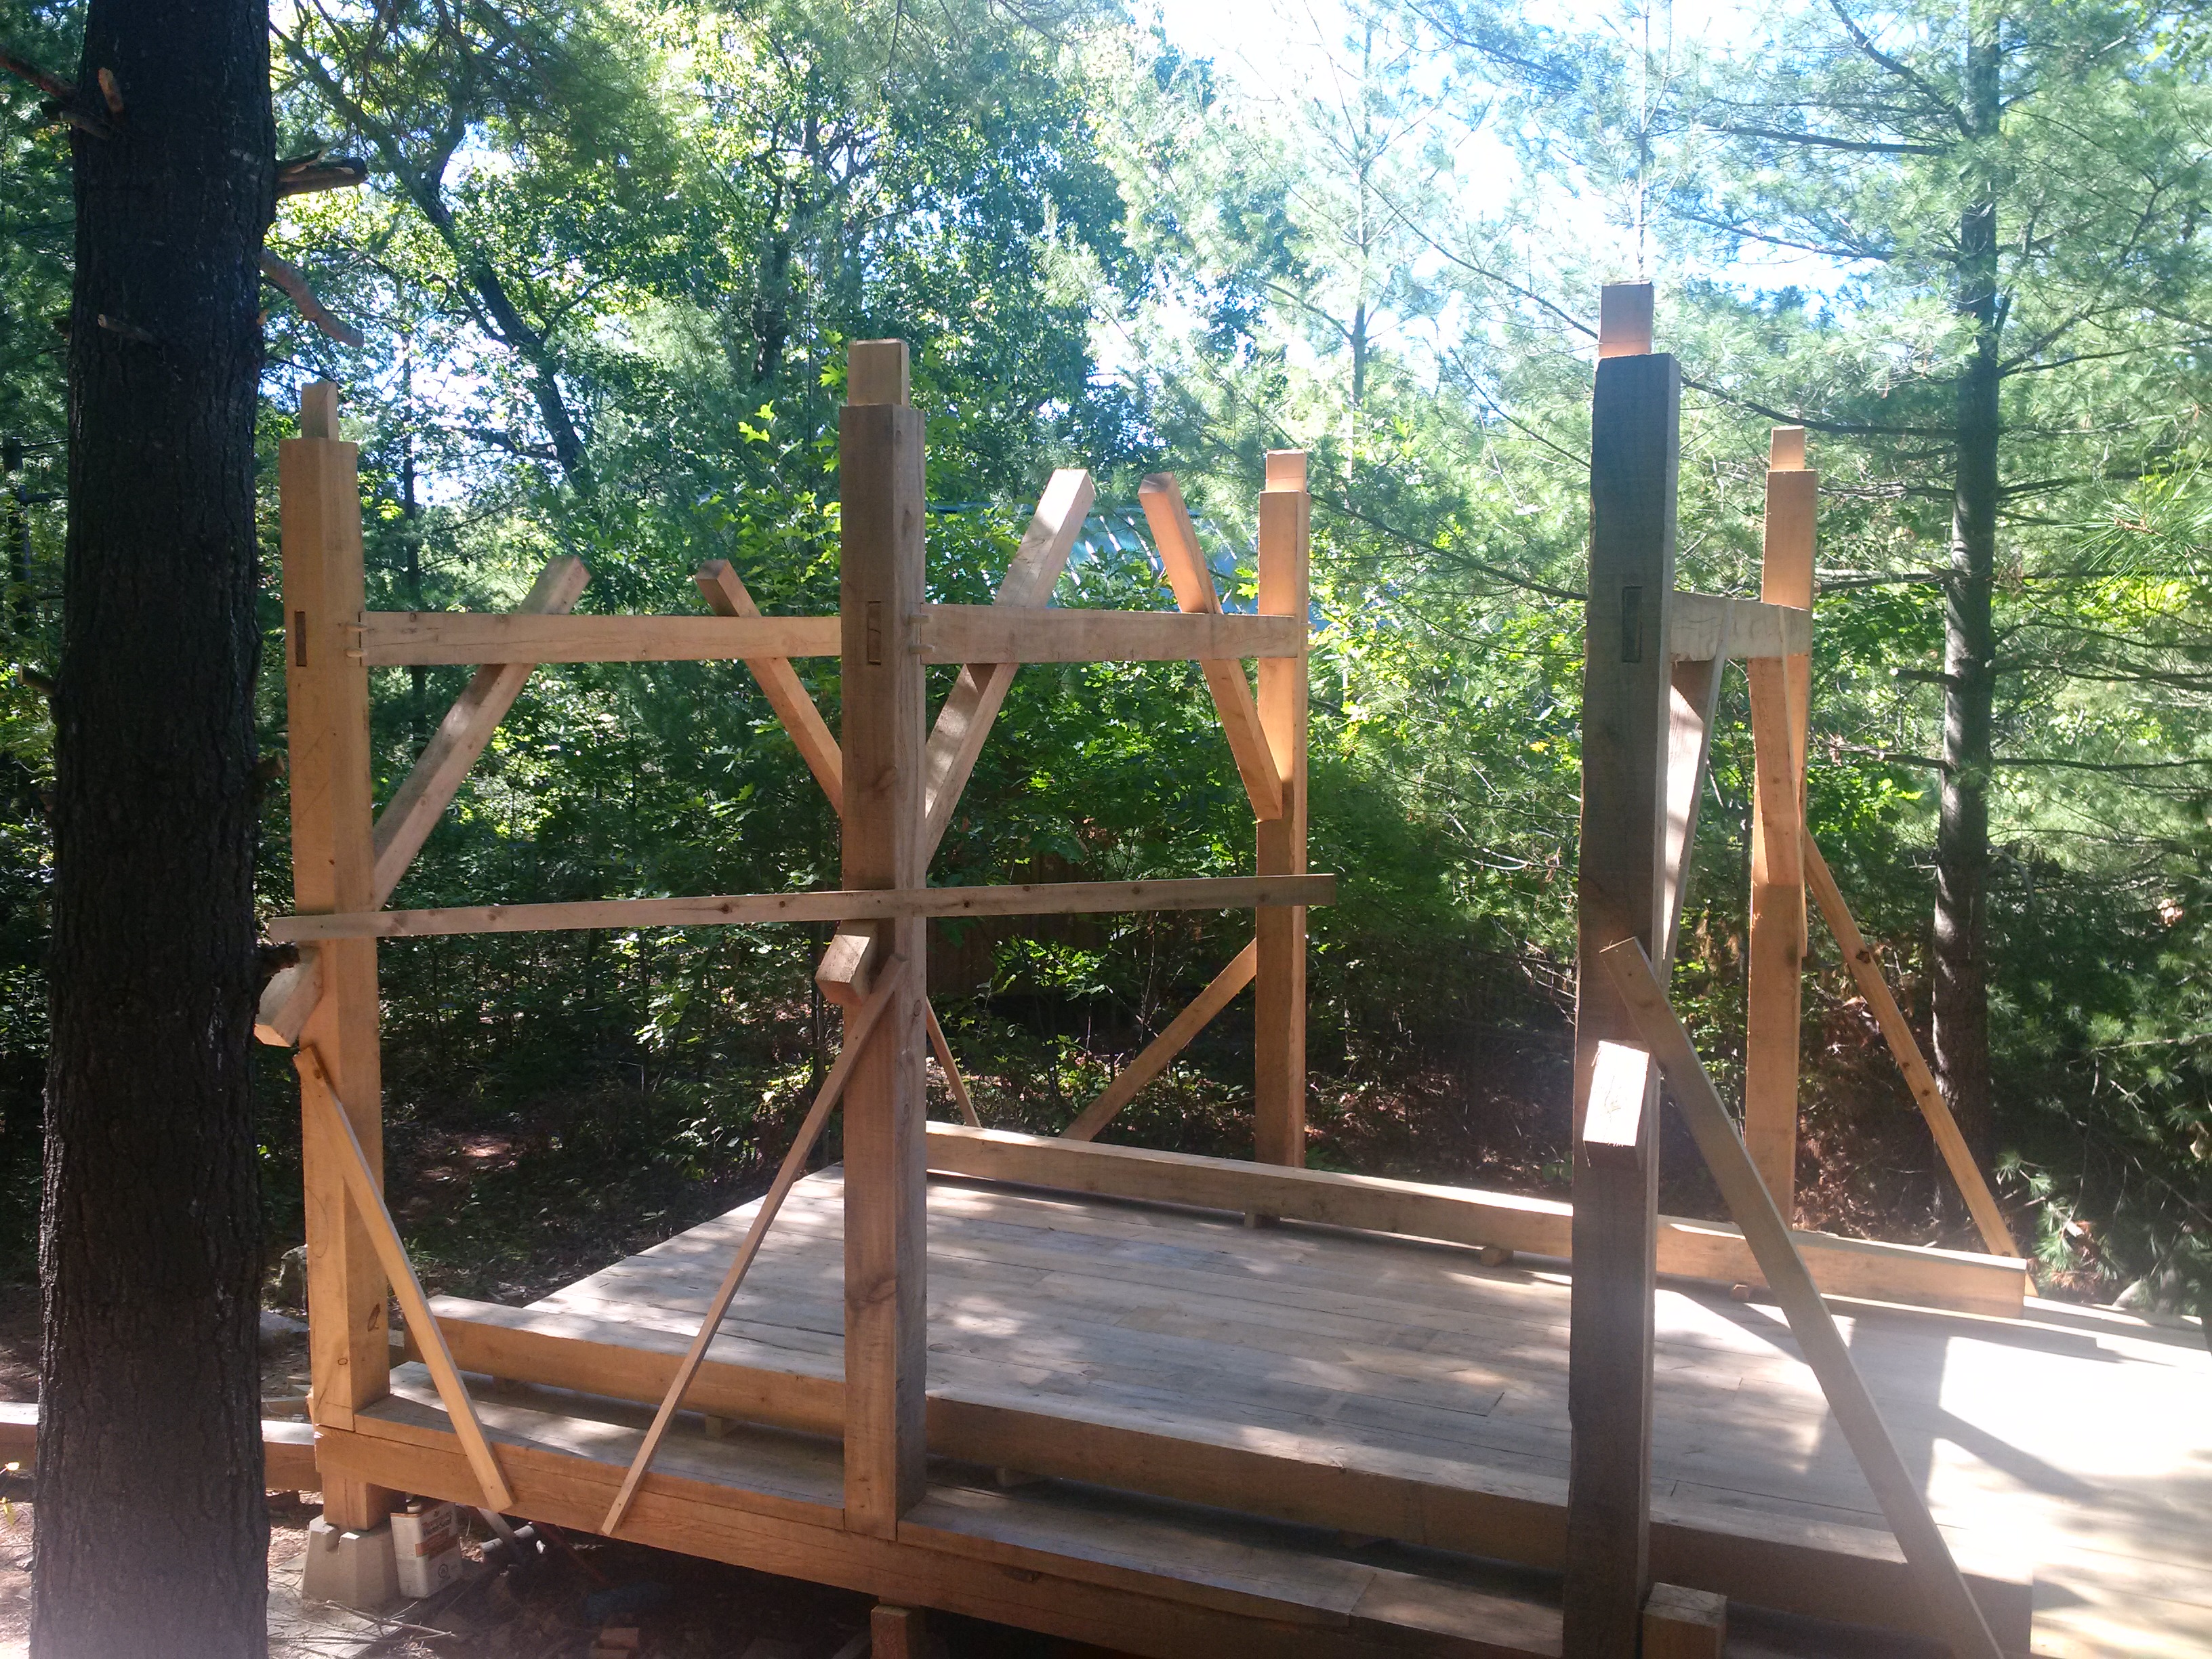 Now that the bents areassembled and braced, the next step is raising them. One person lifts slowly while another manages the bottom of the posts to ensure the stub tenons seat properly into the mortises in the top of the sill beams. Putting the floor on first and cuttong out the pockets for the beams helps to land the post feet, but you still need to be careful not to over-rotate the bent up in case it gets away from the lifter and falls forward. The order of raising is one end, forllowed by the other end and then the middle. Raising the middle bent requires a lift and drag sequence, since it's taller than the space between the end bent and the location of the sill beam mortise. After raising each bent, secure it with temporary bracing. Don't worry about square or level yet; get all three up and then start that process.
Top Beams
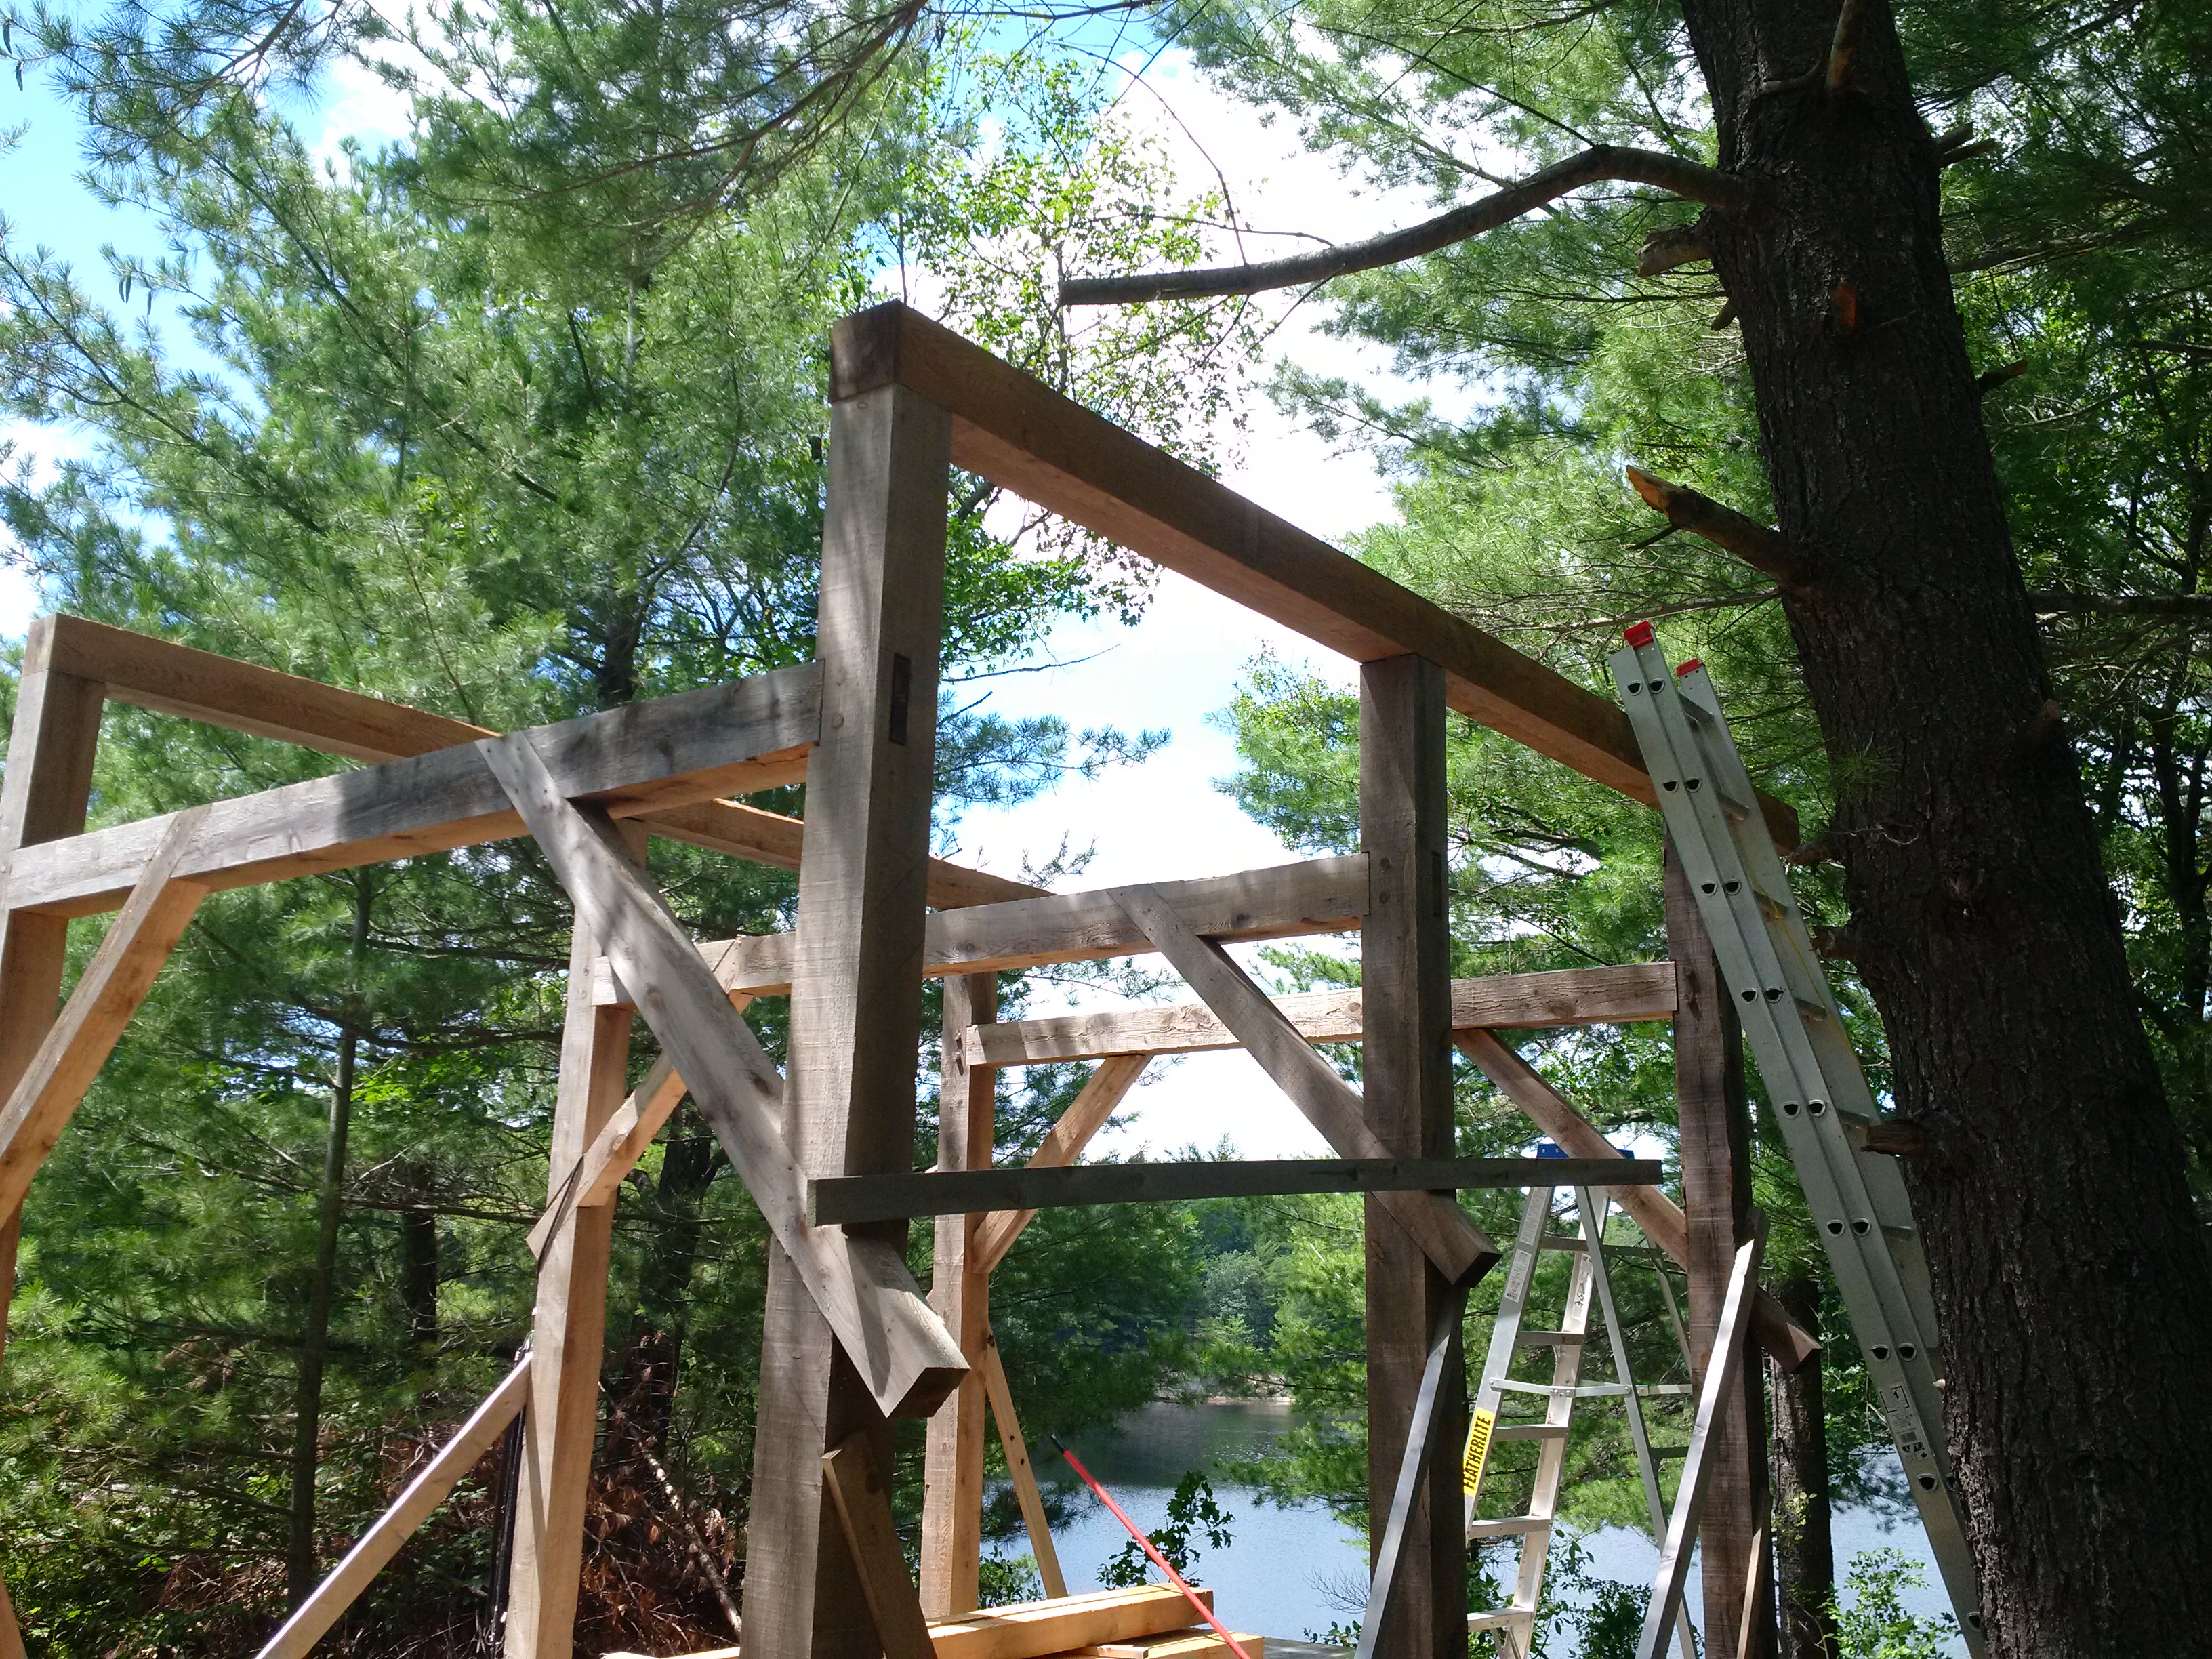 With the bents raised, the top beams need to be set on top of the bent posts. Mortises corresponding to the post tenons are cut and peg holes are augured. The top beams in the case of my barn are not the same 16' length as the sill beams; the mill did not have any. So the top beams only provide a 2' overhang of the porch, but that should be enough to project sufficient shadow on the porch as it faces nearly due north.
To lift the top beams, one end was lifted onto the top of the center bent's crossbeam and then the beam was pushed so that the lower end cleared the end bent's crossbeam, and then the end was set back onto the end bent crossbeam so the beam was resting on all crossmembers. From there, it was slid over against the side of the posts ready for final lifting and placement on the post tops. That's a bit tricky. But myself and a helper up on ladders were able to lift the beam, position the one end onto the tenon and then finesse the other two tenons into place. With a thump or three from the sledge, the beam found its purchase on the post tops. Note that each beam was assessed for crowning, and the crown was set facing up so that over time it would naturally settle onto the top of the center post. In both cases, the crown was less than 1/4 inch, so they were left for a week before being pegged.
Trusses
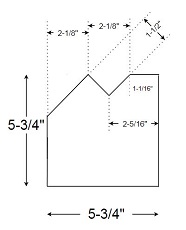
 Math. You need to do some math now. Rough timbers, as mentioned before, are not all created equally. So at each stage of the build you need to measure the actual dimensions of the results of the previous process to make sure the next stage of the build is based on reality, not what was supposed to be reality. What needs figuring is the distance from the underside of the truss peak to the notch in the top beam that is cut to accept the foot of the truss. Here, the top beam is 5-3/4 inches square, the trusses are 3-7/8 inches square, the distance between the top beams (truss span) is 110-5/8 inches, and the notch for the truss foot to sit in is 2-1/8 inches wide at the top face of the beam to accomodate the 1-1/2 inch notch (same as the corresponding cut out at the bottom of the truss). Easy.
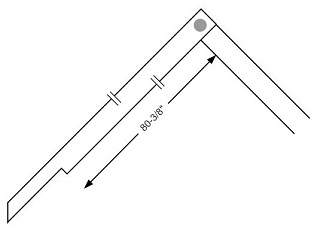
All you need is Pythagorus' theorum and a couple of attempts at making sure you are computing the correct side of the triangle, and it's as easy as pie - however you do not use Pi for any of this. As it turns out, the distance from the underside of the roof peak to where I needed to notch out the truss was 80-3/8 inches. This is not an exact science - there is a 1/2 inch variance in the distance between the top beams, both positive and negative, depending on which truss is being raised, but there is enough give in the material to accomodate that sort of fluctuation. The other oddity I suppose is that the trusses are on 28 inch centers. Each gable end is flush with the outside, but in order to have only four internal trusses, and stay away from the center post tenons and the braces, the distance was divided evenly and that's how the outcome is so strange. Since it's going to end up being a metal roof with a 12/12 pitch with no snow break, the roof itself won't be carrying much load, that's why the decision to use just a total of 6 trusses made sense. But because of the odd measurement, the metal roofing that will be installed needs to be fastened with the correct length screws so that the fasteners don't pierce through the roof boards.
One last thing to mention - each of the gable end trusses has a girt tying the trusses together. This is a structural element providing support. But it serves a secondary purpose as a fixture to secure the board and batten cladding to. They are set so the top of the girt is 12' above the underside of the sill beam. This allows a 12' board or batten to be set at the midpoint of the girt to create a drip edge at the bottom of the board and keep any rain away from the sill beam. Here, the top of the notch in the truss to accept the girt is 43-3/8 inches from the underside of the truss peak and is 5-7/16 inches wide.
Truss Raising
Once the trusses were assembled, the same boards that were to be used for the siding were laid across the top beams of the bents to provide a surface to walk on. Each board was secured to the beam with a screw so they couldn't wander around while the trusses were going up. Each truss was lifted to the top beams upside-down, then my helper and I got up onto the boards being used for scaffolding, rotated the truss upright and slotted the notches into place. Remarkably, the math was correct, and the truss dropped into the corresponding cut out on the top beams with ease. We started at the south end and braced the gable truss with some scrap 1x2 to the scaffold boards. As each truss was installed working to the north gable, additional scrap was used to secure each truss to its neighbour, making sure to keep everything true. The north end gable truss was the last one to be raised. Once it was in place, two of the 2x8 siding boards were used to brace the gable end, tying in the sill beam, bent cross-beam and the girt & truss. This additional bracing was installed at the south end as well, since I wasn't going to be able to do the siding work until the roof boards were on...
Roof Boards
The roof boards again are hemlock, rough sawn 1x8 that are full dimension and 14' long to allow for a 1' overhang at each gable end. Anything longer than that would have required additional support to cope with heavy snow loads. Starting from the bottom of the trusses on the east side, boards were screwed into each truss with 2 1/2 inch deck screws to ensure a good bite. The boards required no cutting, and were butted up against each other. A chalk line was snapped halfway up to ensure everything remained aligned, and the occasional use of a strap and winch was employed to straighten out boards that weren't exactly true. Once at the peak, the west side roof boards again were started at the bottom of the trusses, and for the final 3 courses close to the peak work switch to on the roof with ladders - all the previous boards were installed from the platform formed on the bents' crossbeams.
Siding - Boards
In keeping with the theme of the barn, and being the most economical option, full width and thickness 2x8 hemlock was used for the main siding boards and 1x6 hemlock ripped in half was used for the battens.
Metal Roof
The installation of the metal roof was hired out to a local roofer, who laid housewrap on top of the roof boards, then the metal roofing. Some things are better left to people who don't mind working on 45 degree roofs. He was prompt and got the job done in a morning for a few hundred dollars plus materials.
Doors
Siding - Battens
Sealing
Windows
