The Great Room
That's the idea.
We've owned the cottage since 2013 and steadily improved the shortcomings that were present when we got the keys: installed new floating dock, installed a mantle and surround for the propane fireplace, finished the floor and hand crafted a bed for the bunkie, finished the bathroom, completed the water system, timber framed a mini-barn workshop, repaired and reinforced concrete piers, new kitchen cabinets, new propane fridge, installed a cooktop, refinished the kitchen floor, installed a kitchen island with marble top, rebuilt the deck, flinstoned a picnic table, added built-in storage in the master bedroom, replaced the old generator with a new 12kw propane generator, and accomplished lots of small decorating and landscaping projects that make it feel like ours.
What the original cottage still lacked however was inside space.
We have the waterfall lot and the other lands across the lake for added trails. We have the old Imperial Oil service station at Hwy 7 for winter access. What we don't have is a wood stove for heat in the winter, a full solar system to reduce reliance on our 12kw propane generator, an extra bedroom, and a room big enough for the family to hang out in. Hence the addition of a great room. It's not small. Forty-four feet by twenty feet. It essentially doubles the gross living area of the original cottage. This is intended to be a highlight journal of the build process, complete with the stuff that went a little wrong along the way.
Planning and Scope Creep
 The idea for an addition of some kind had been floating around for a few years. After we rebuilt the deck in the spring of 2019 there were plenty of planning sessions on the screen porch about what was going to be next. We have always had trouble fitting everyone in. When the four kids and parents or friends come for a visit we typically need to manage the number of visitors to ensure we have enough beds. The bunkie can handle two, the small bedroom can host another two, and the day bed can be used to rest one more. But with four kids and associated tag-alongs, parents, extended family, boys and girls weekends... it's a bit of a jumble. And the biggest drawback is the lack of somehere to just sit and relax.
Sure, there is plenty of the great outdoors. But when the weather doesn't cooperate the cottage 'living area' is tiny - 9 feet by 18 feet, and there's no real inside dining area. We needed a great room. Okay, how great? We wanted to take advantage of a fairly flat part of the property directly south of the original cottage. We could connect the new space to the old space by opening up an existing window in the kitchen. And if we set the elevation of the new space down a couple of steps, we could tuck the peak of the roof under the existing eaves of the cottage - no need to mess with the old roof. We had an area of about 800 square feet to work with, bounded by the edge of the granite rock face to the east and the front of the existing cottage to the west.
We got out the measuring tape in the fall of 2019 and marked out a 40' by 16' box on the ground that would become the new great room. Then we moved to the design phase. If you're familiar with draw.io then you know it's handy for just about anything, and I used it to layout the overall structure, the joist and wall plans, the roof trusses, the wiring and lighting plan, and the foundation piers. The original design had two new bedrooms, the great room, a wall of storage closets and a new main electrical panel that would also house the solar batteries.
Looking at the plan, we decided it wasn't big enough. If we're going to do this, we thought it was better to go bigger since this was likely the only time we were going to build an addition to the cottage, and adding on would be a struggle in the future. So what was big enough? We weren't sure. So we added four feet all the way around - now we were at 44' by 20'. We measured that out on the ground. It meant dropping a couple of extra oak trees, it meant closing in a small section of the screened in porch, it meant the gable end wall would be another foot higher off the existing ground, it meant pushing the limits of being able to get the conservation authority permit. But those extra eighty square feet would make the bedrooms larger and would provide a wider hallway and more 'walking around room' in the main great room. All of that equalled more possiblities when we thought about how we would be furnishing it. All good. So with modified drawings completed we began the process of applying for the permits.
Permits in a Pandemic
We needed two permits. One from the local conservation authority, one from the local municipality. Neither was a struggle, apart from trying to get them done in a pandemic. The local municipality worked with us to ensure the structure was sound and all throughout the build passed along tips and tricks that would make the job easier.
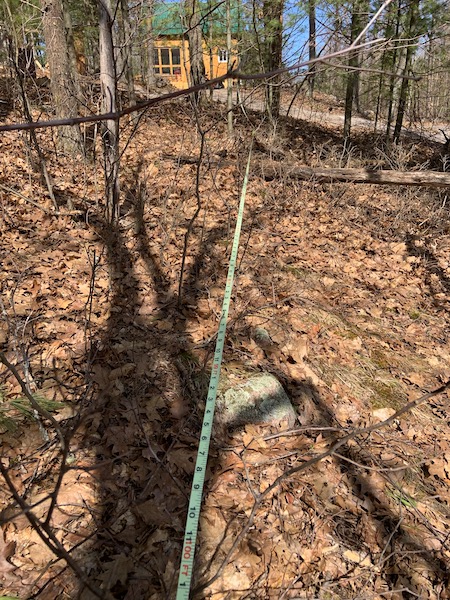
Likewise with the conservation folks. The pandemic prevented our contact at the conservation authority from performing a site visit, so that meant taking lots of pictures, making measurements from the outside of the building envelope to the natural features on the property - primarily the lake and a watercourse to the southeast - that required threading measuring tapes through the woods and down the slope to get to the water. Not hard, but when you've been using Google Earth to figure out if you've got the required 100 foot clearance, it's a bit nerve wracking until you get the actual distance.
 Once the conservation folks had all the info they needed, we got the okay to proceed. And once we had the conservation authority's blessing, we got the permit from the municipality.
We did learn something important. Our septic system is rated for a three bedroom structure. That rating is based on the usage of a normal home, not a seasonal dwelling. So while we thought we could add two bedrooms as part of the great room build, we could only add one.
It seemed a tad unfair, since in normal times we are only there on weekends for the number of months that we have running water - in the winter we rely on the outhouse, there are no liquids or solids headed to the septic because the main drain runs above gorund for about thirty feet before getting underground. And since we 'shower' by swimming in the summer months, there's not much going into the septic system. But rules are rules, so we opted to use what was going to be a bedroom as an office area. And that saved building and finishing one ten-foot section of wall.
Budgeting - Stuff Needed vs Stuff Wanted
We roughed out a budget. I say roughed one out because any numbers we had before the pandemic meant very little after the pandemic was in full swing. Also, there were things that (as always) change throughout the build process. We changed some things because we had to, others because we wanted to. Suffice it to say that we ended up 12% over what we thought we would spend. Some of the major changes include:
- Sprayed insulation vs conventional rockwool bats
- Not installing an incinerating toilet
- Using 6-foot sliding doors either side of the wood stove instead of large windows
- Using engineered floor joists rather than conventional lumber
- Hiring out the aluminum soffit and gutter work
- Upgrading the solar system with a bigger (and smarter) inverter and adding a third battery
- Doing all the electrical myself
Trees and Where to Put Them
 As the permits and drawing were being prepared and drafted, there was one thing that could happen before the official start of the build: felling trees. There were a number of oaks and pines that needed to come down to make room. Some of the trees weren't in the best of shape, and one in particular was posing a bit of a threat to the existing cottage. So in the early months of 2020 we started to thin them out.
Starting in February, we dropped a big oak and a couple of medium pines. The trunks of the pines were used to pile the processed oak to keep the hardwood up off the ground to help prevent any rot setting in once the warmer weather arrived.
 We had a mild March. And each weekend we managed to drop and process another couple of trees. Some days the neighbour Anil would assist, which was handy since some of the oaks were leaning exactly the wrong way from where we wanted to drop them.
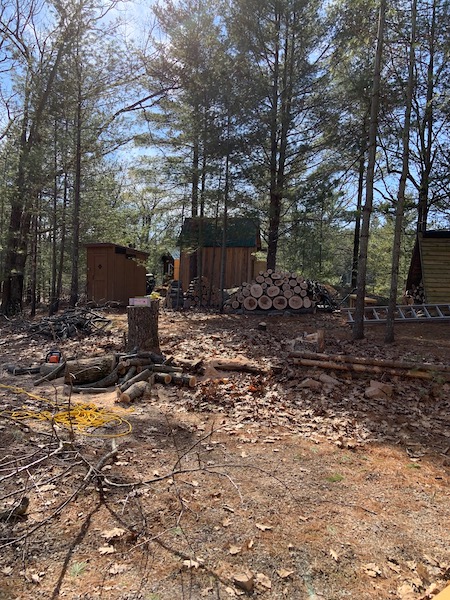
Each tree that came down had the branches bucked off; larger branches were cut into firewood lengths while the smaller oak branches and all the pine kept us warm as they burned in the hobo barrel. Then the firewood sized peices were stacked out of the way so that the next tree could be felled.
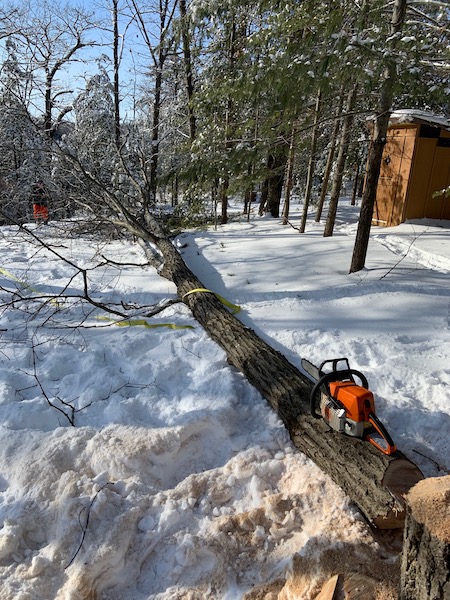
The most worrying one was the big twin oak that was only four feet from the deck, just off the screened porch.
 The first twin was leaning southeasterly awy from the cottage and was the smaller one. We lashed a tow rope to it and a couple of 5-ton ratchet straps which were then secured to the winch on the ATV. Super Anil managed the tension on the rope as I carved out the notch and when I was through the trunk about 80% he began to bring in the winch line synchronous to reversing the ATV.
Boom. The first twin came down withuot an issue and we started to process it.
The second of the twins was a different matter. We again secured a line to it, but much farther up the trunk. We again used the ATV to help sway the oak's fall in a southeasterly direction, however we used some extra leverage (or rather, extra security) by placing the ATV close to right angles from where we were trying to land it, thinking the extra directional tension would help things go okay. I cut the notch at a much steeper angle, sighted the notch about 30 degrees farther over from where I wanted it to fall, and the back cut was also a lot steeper, so that the tree would take the easy way to the ground. I appreciated all the arborists on YouTube who had posted videos dealing with exactly the same sort of situation.
 I could hear that the oak was starting to go. I tossed the chainsaw out of the way and leaned on the tree hard as Anil pulled the line with the winch and the 850cc Outlander. And it started to fall. Exactly where we planned. That doesn't mean I didn't run a fast as I could in the opposite direction - I did. And there were some concerning squeals from the gallery until it came crashing to the ground. But once the branches stopped waving from the inertia, we all breathed a sigh of relief, did some fist bumping and got to work processing it.
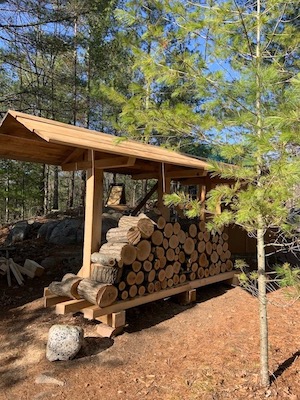
Then came the lull. The time between applying for permits and getting permits. But I was prepared. The previous fall, in anticipation of building a great room with a wood burning stove and needing to cut down some oak trees, I had prepped hemlock timbers for a woodshed - you can read more about that here.
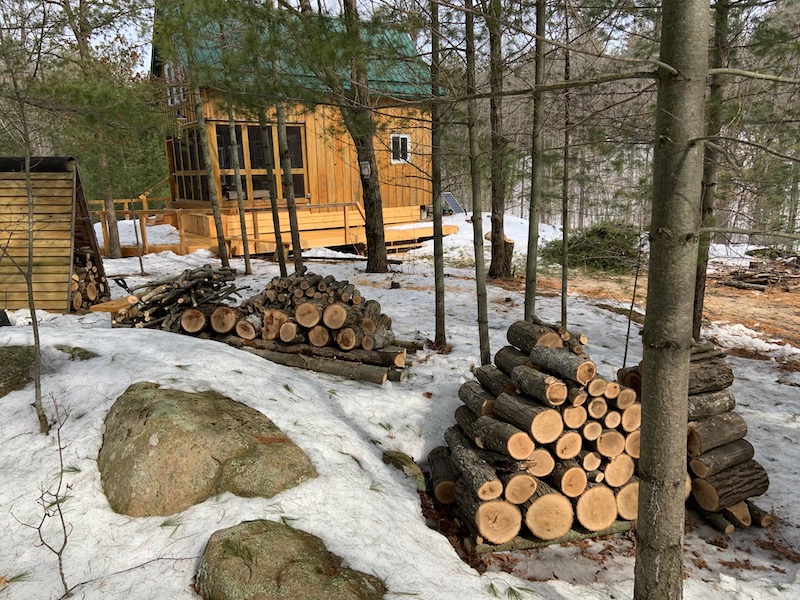
Hemlock 6x6's and 4x4's would support a platform for the firewood and a roof made out of 16-foot 1x8 hemlock boards would help keep it dry. So during the lull I assembled the woodshed and we filled it up. The green metal roof was put on during another lull in the great room works.
Starting Stuff: Foundations and Quick Sand
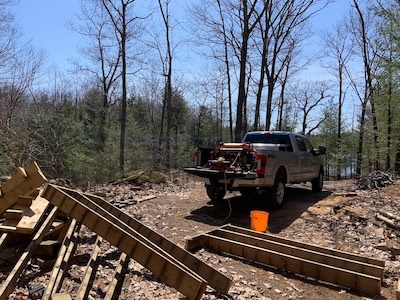 April 6. Permits in hand. Time to get going. First thing first - the deck that we had rebuilt the summer before had to be removed from the south side of the existing cottage. Not a hard job since it was just sitting on deck blocks on the ground. It just took a day to unscrew and pull the deck boards up, sawsall the joists from the stringers and remove all the joist hangers, take the facing down from below the board and batten, cart all the old pressure treated lumber down to the lower driveway, pile the SPF deck board lumber off somewhere safe for re-use on the new deck. Not hard, it just took a while. And then I needed to clean up all the debris and leaves that had found their way under the deck. Once all that was done it would be time to get the bobcat running and start to get the area ready for piers.
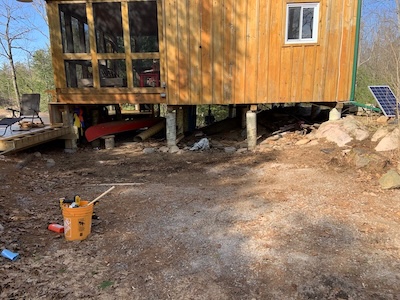 The area was clear now to start shifting dirt. The hope was there would be rock in the depression between the outcrops of Canadian Shield on the either side of where the driveway had been, and by scooping out the dirt and gravel I would be able to set the forms for the west, center, and east row of concrete piers directly on the bedrock. Or at least be able to scrape the majority of the soil away so that only some minor digging by hand would be required to get the piers up. Also, if we could flatten the area out as well it would provide good dry storage and lots of air flow under the floor of the addition to keep things dry.
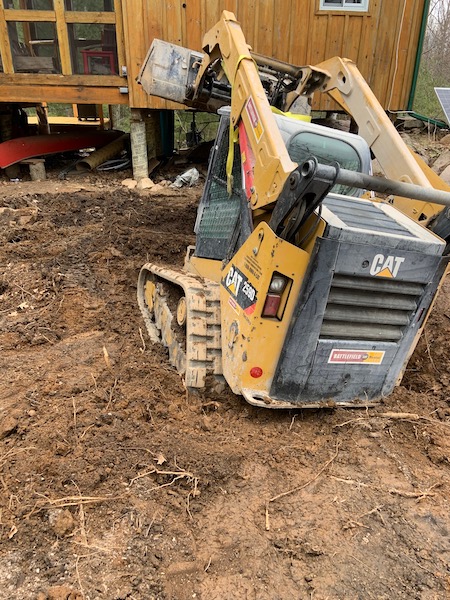
The best way to shift that amount of earth was with a tracked skid steer, aka a Bobcat. I rented a unit for a week and they were kind enough to deliver it on a tilt deck tow truck. The driver was great and drove the truck all the way up the cottage road to drop the unit off at the gate. These skid steers are a little tight for someone my size. One thing to remember is that the front bucket needs to be in a certain position before you can enter and exit the cab because of the way the door operates. It was dropped off middle of the afternoon on April 6 so I used it for about an hour to clean up some spots on the driveway, just to get used to it, and decided to start in earnest the next morning.
Up early as always. Had to wait for some decent daylight and then got the skid steer fired up and started to clear the addition area. I managed to get the top one foot of ground off, saving gravel whenever possible, and exposed a lot of the rock down either side. Next I went up close to the existing cottage and took a couple of more scoops off the exposed earth. On the third scoop, as I started to reverse out to where I was dumping the dirt, the right track started to sink. And sink a lot. The entire machine nearly tipped over onto its side. I quickly dropped the bucket to stabilize the machine. And it kept sinking down and to the right. So I managed to get out of the cab, grab a 5-ton ratchet strap, hook the one end on the left side of the cab frame and loop it around a tree and take the slack out of the strap. It stopped sinking, well, it stopped tipping. Hmm. What to do now?
 In the picture you can see the broken strap. It's hard to show just how tilted the machine got and how deep the machine sunk into the dirt. But I spent six hours digging, using 2x8 boards to shim under the tracks, using 6x6 posts with chains and the truck to try and get the beast unstuck, but there was so much mud that I think it had created a vacuum (like when your boot gets sucked off your foot in mud) and I was afraid of breaking something that would cost thousands to fix. So I stopped. I tied some more lines to it, propped some more boards against it, each was an attempt to keep it from getting sunk any further. Then I poured a drink and looked up towing companies...
Sure, it's a bit embarrassing. Sure, you wonder why things go the way they go. But stuff happens. And this stuff was quick sand. Now, there probably was still some frost in the ground, but after walking around the disaster I eventually realized that there definitely was a bowl of granite bedrock where I was attempting to dig out the dirt. The benefit and downside of a bowl is that it holds liquids. And that must have been the issue - disturbing the dry soil on the top and exposing the wetter soil while running a heavy piece of equipment on it, churning things up. Now the question was could it be retrieved? I called a local towing company to ask if they had a wrecker that had a 10,000lbs winch - I figured the machine didn't weigh any more than that, but some extra grunt might be needed to pop it out of the hole. They did. But it was one of the wreckers they use to tow tractor trailers and things would need to be confirmed. I waited for the callback. When it came, the news was good, apart from the price, but the driver was on his way.
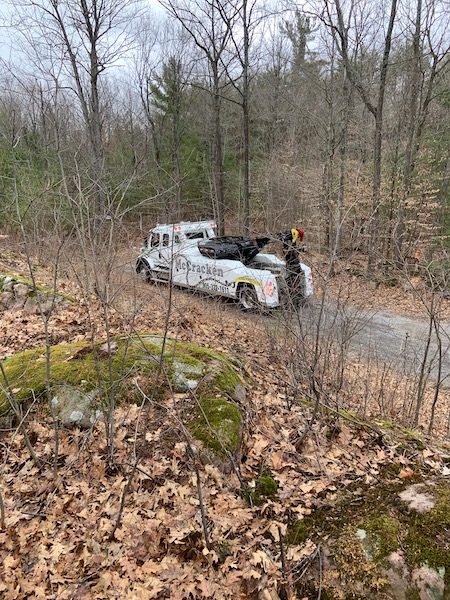 I waited, because that's all you can do. After about 90 minutes, I heard a rather large truck working it's way up the cottage road. Its engine noise only broken by the occasional 'beep-beep-beep' of its back up alarm. And then it seemed really rather close and to my surprise, relief, and worry it was backing down the driveway. The driver was a friendly gent who extolled his piloting prowess as he gave me the blow-by-blow of his drive in. The upshot was he didn't think he'd ever get in and was concerned he'd never find somewhere to turn around so he could get out. He walked up the hill with me, had a look at my mess, and jogged back down to the wrecker. He lifted the crane boom and pointed it at a large oak that was on the inside curve of the hairpin turn up the hill to the cottage. Then, with a snatch block in hand, scurried up the hill to secure it to the base of the oak tree he was going to use as a pivot point for the winch line. After spooling out line, threading it through the block and attaching the hook to the bottom rear frame of the Bobcat, he advised we take cover, since if something let go and the winch line got us we'd be dead. He started taking up the slack in the line and as soon as it was taught there was about 5 seconds of engine revs until the Bobcat lurched out of the muck and was rolling backwards along the driveway. The tow guy dragged it to some solid ground, scurried back up the hill, disconnected his gear, wound the winch line back in, reset the crane boom and pull out the workorder. He asked me to call dispatch, they asked for the credit card info, I received a copy of the invoice and he was back in the cab and on his merry way. Whew. And yes, he got out without an issue, no doubt because of his excellent skill behind the wheel.
I did continue to use the Bobcat, but stayed away from the bowl. And once everything that could be done with it was complete, I called the guy who dropped it off to come and get it. All good. Except, we now faced a challenge on two fronts: any holes for the foundation piers were now going to have to be dug by hand, and how was the center row of piers going to get done? How deep was the bowl? Back to the drawing board.
Another lull. I needed the ground to dry out. What else could be done while things were on hold?
Floor Stuff - Beams, Joists, Insulation
Next
Warm Floors
The
Wall Stuff
Every
Solar Panels, Trusses, Roof Stuff
Elecrical Stuff
Window & Door Stuff